Sword Scabbards the inexpensive way
Posted: Tue May 13, 2008 10:38 pm
Items needed:
1/2" plywood- slightly larger then the blade of your sword
paneling- two pieces slightly larger than the blade of your sword
Sherpa(synthetic sheepskin) or actual sheepskin- 2 pcs the same size as your blade
leather hide -slightly larger than your blade -2 pcs
Tools needed:
marking pen
measureing tape or yardstick
straight edge (not needed if you have a yardstick)
wood glue
wire nails and hammer
clamps_ useful but not needed as you will see
jigsaw
File, sandpaper (bench sander is the way to go but I've used all with good results.
scissors or a sharp knife
needle and thread optional
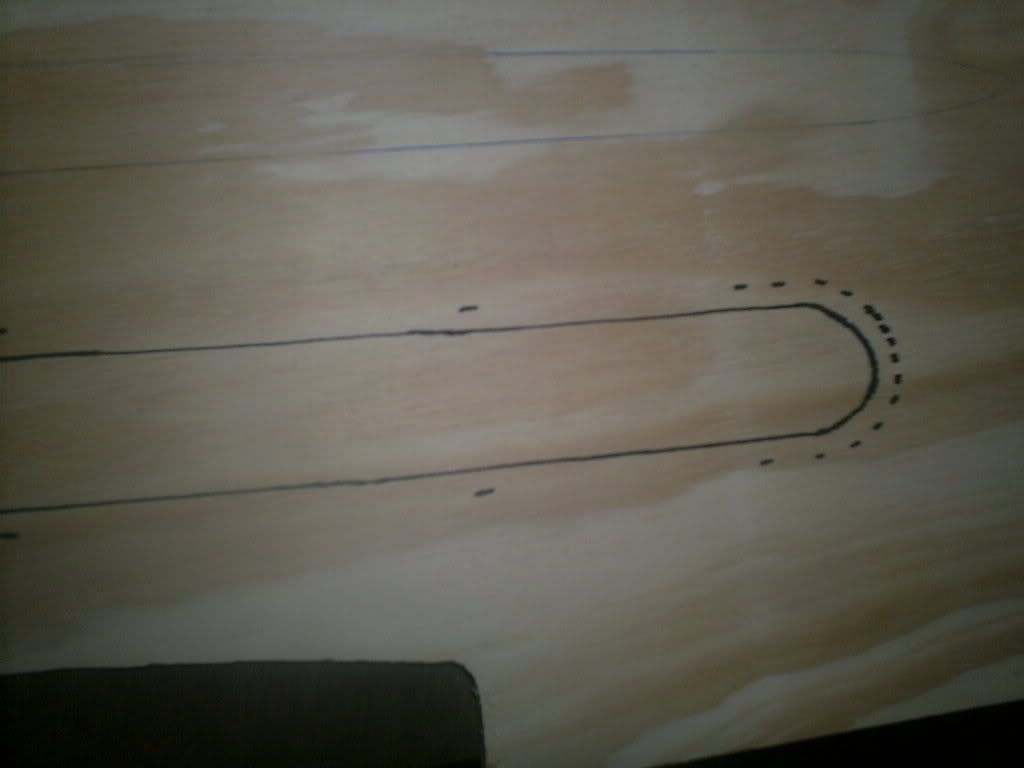
Lay the sword/dagger on your plywood and trace the outline. Measure a 1/4" on the outside of the outline and plot dots all along the tracing. Useing the straight edge connect the dots. You will need to connect the dots around the point by hand so plot a lot of dots around the point.
You will now have a tracing of your blade with a slightly larger traceing outside the original one.
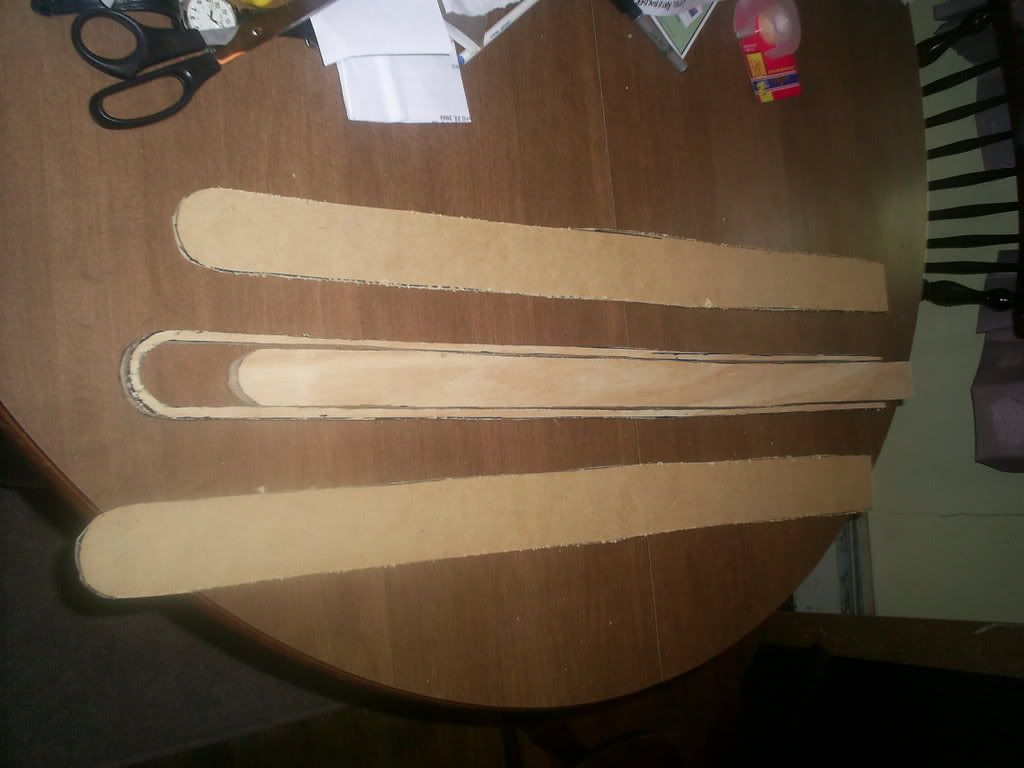
Useing your jigsaw cut out the outer tracing.
Take this outer tracing and transpose this outline to your two pcs of paneling and cut them out. You will now have three pcs the same size, two of thinner paneling and one piece of 1/4" plywood.
Next use your jigsaw to cut out the original tracing from your plywood carefully. Keep the piece you just cut out, you'll be useing it soon.
With your file or sander remove any rough pieces from the paneling and the plywood (inside and outer edges).
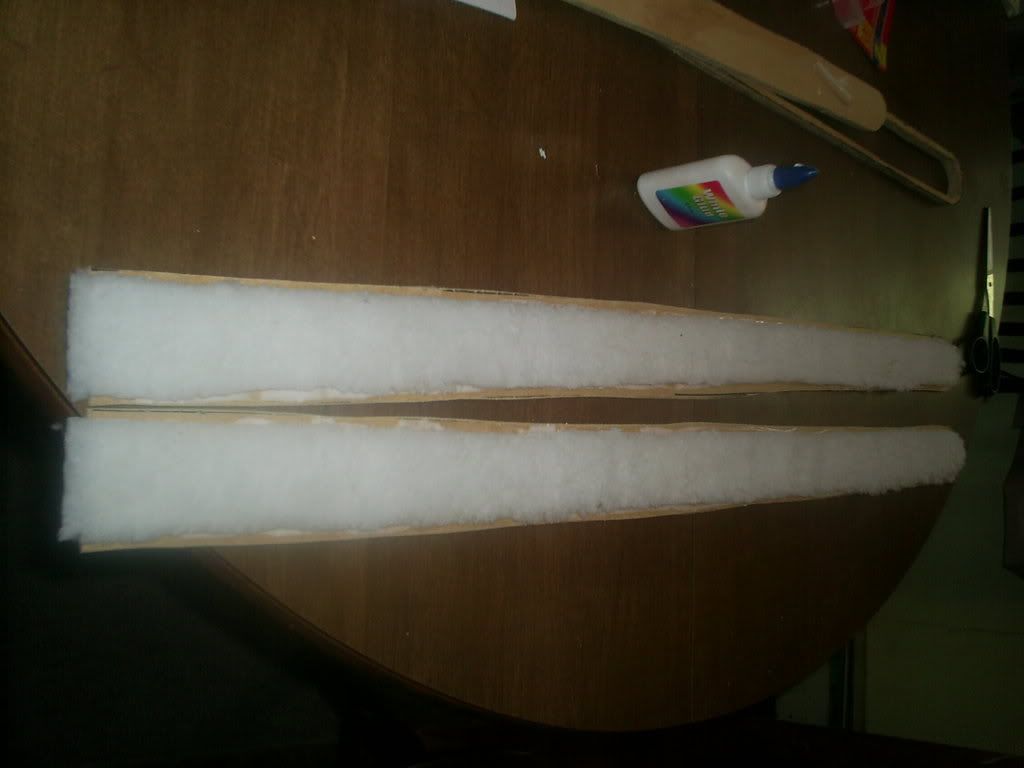
Take the inner piece you removed from the plywood and lay it out on the backside of your sherpa or sheepskin lining material and trace it onto the material. Flip over the inner plywood piece and do this a second time so you have two outlined pieces.. Remove this piece of plywood from the work area to avoid confusion, you will not be useing it any longer.
Take the paneling pieces and glue the centered lining to the rough side. Do this for both pieces.
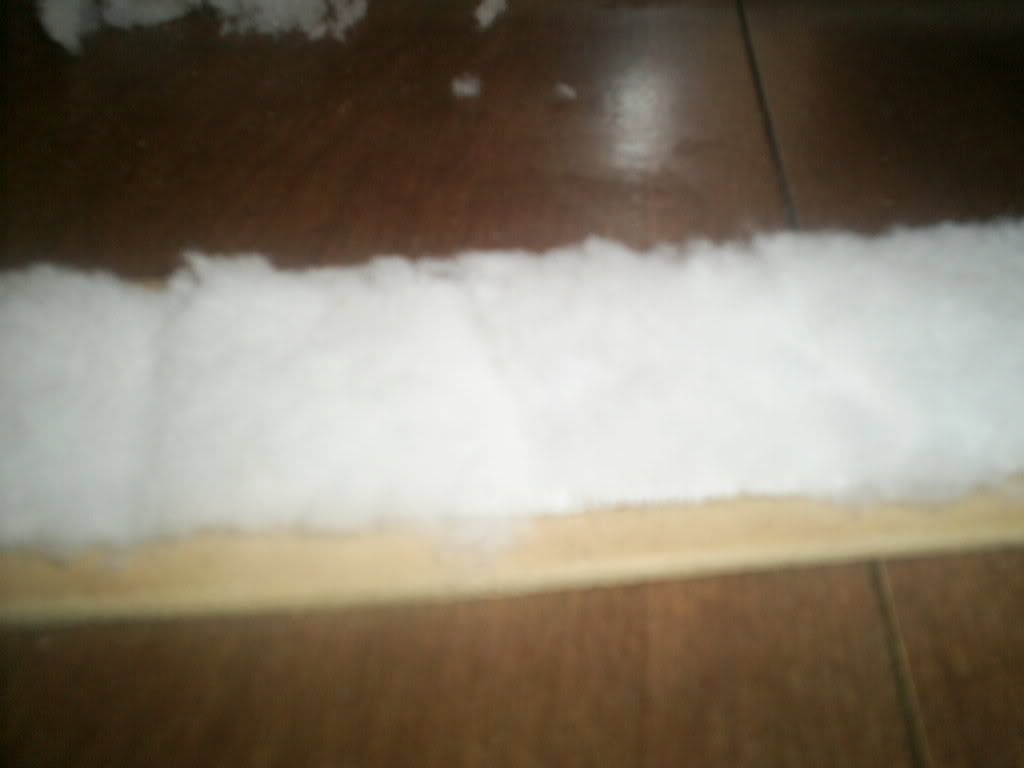
Once the glue has dried, take your sissors and cut the lining material's pile down. Do this cross wise and trim it every other inch or so. If you look at it at eye level you should see hills and valleys. When Finished:This will force the lining material to brush back and forth over your blade when sheathed or drawn. When coupled with some oil in the scabbard it will give you a nice even coating of oil.
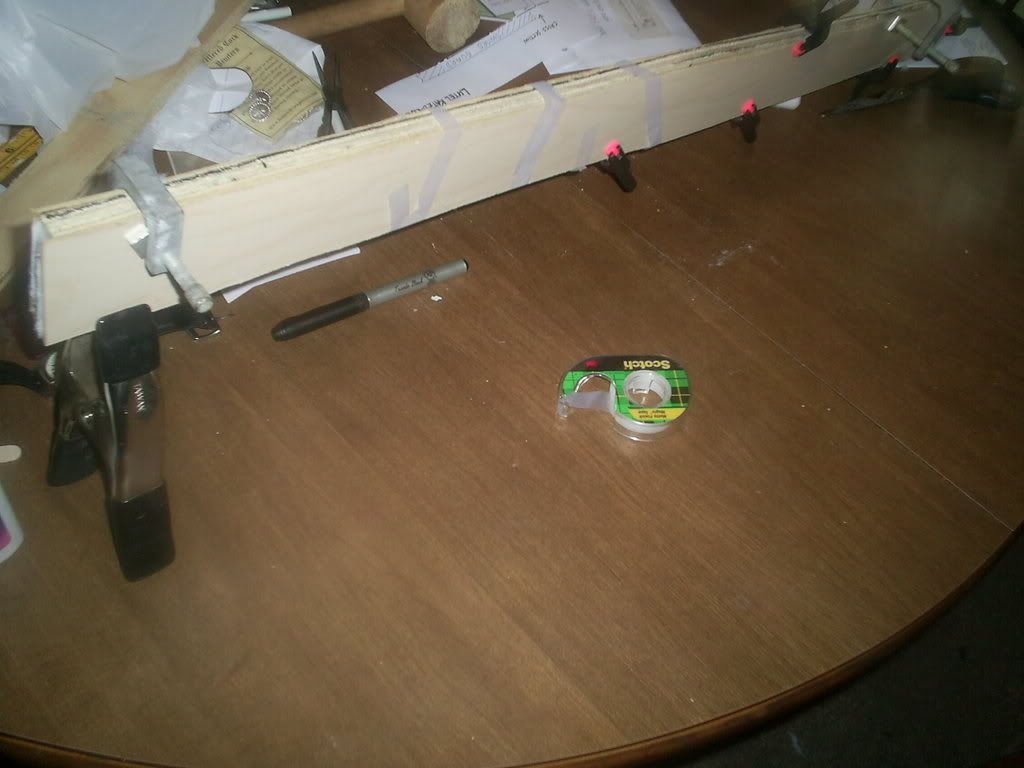
Take the thin center 1/2 pc of plywood and glue it to your panel pieces like a sandwich: panelw/lining, plywood, lining w/paneling.
Clamp the pieces together. If you don't have clamps, cord or even tape wrapped aroungd your scabbard will work. Let the glue dry.
Take off your clamps, tape or cord and you finally have something that starts to resembles a scabbard.
Sand or file down the outer glossy edge of the paneling and continue to form the final shape of the core to your satisfaction.
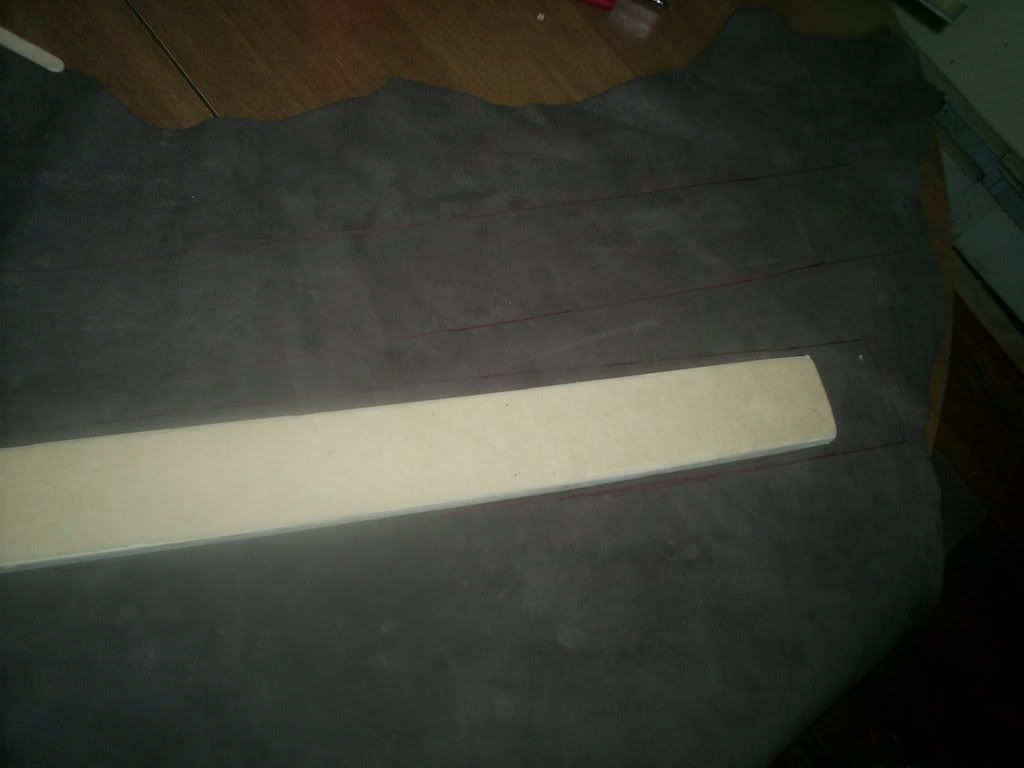
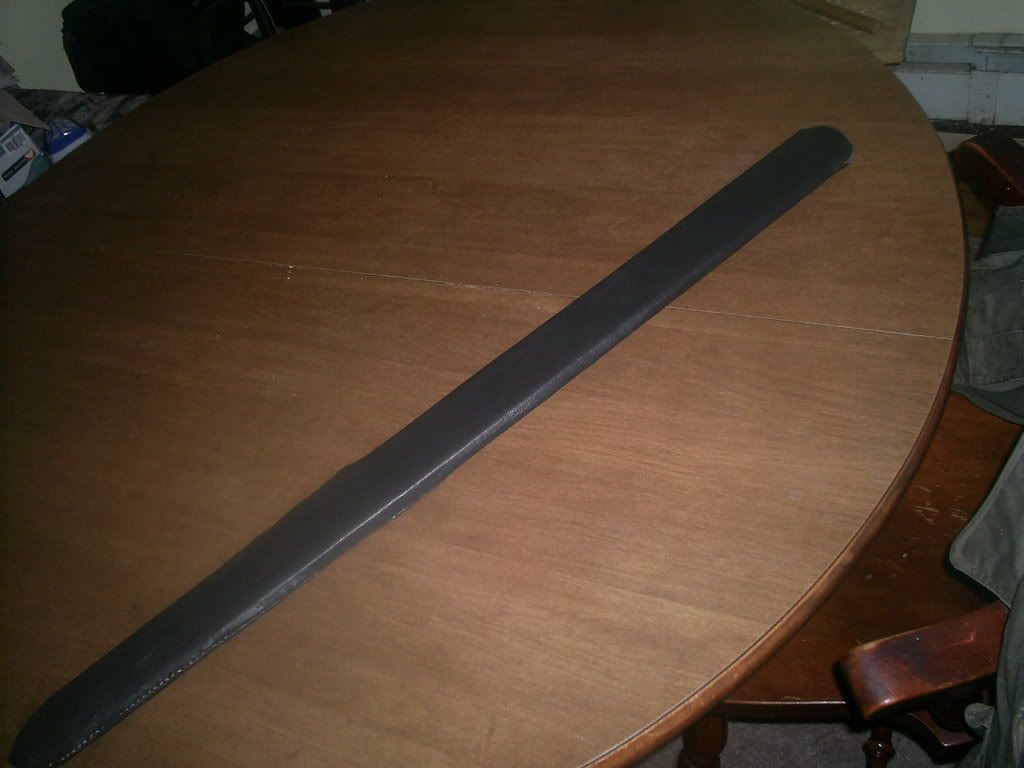
There are a number of ways to attach a leather covering. The easist is to have both a throat and a chape so the center section is pretty much just a glued leather wrap with a throat piece and a chape over the ends. The throat and chape can be either leather or metal.
The next would be a single or double stitched tube with throat and chape.
The cheapest but most difficult is no chape or throat piece. For this you have to cut out two pieces of leather, punch holes all around and then after stitching and turning it rightside out, pull it on like a stocking. Trim your nails before doing this one as you can easily scratch the leather pulling the on.
Even with gluing time and a break or two you can knock off one of these in 4-5 hours start to finish.
I'll add pics later.
1/2" plywood- slightly larger then the blade of your sword
paneling- two pieces slightly larger than the blade of your sword
Sherpa(synthetic sheepskin) or actual sheepskin- 2 pcs the same size as your blade
leather hide -slightly larger than your blade -2 pcs
Tools needed:
marking pen
measureing tape or yardstick
straight edge (not needed if you have a yardstick)
wood glue
wire nails and hammer
clamps_ useful but not needed as you will see
jigsaw
File, sandpaper (bench sander is the way to go but I've used all with good results.
scissors or a sharp knife
needle and thread optional
Lay the sword/dagger on your plywood and trace the outline. Measure a 1/4" on the outside of the outline and plot dots all along the tracing. Useing the straight edge connect the dots. You will need to connect the dots around the point by hand so plot a lot of dots around the point.
You will now have a tracing of your blade with a slightly larger traceing outside the original one.
Useing your jigsaw cut out the outer tracing.
Take this outer tracing and transpose this outline to your two pcs of paneling and cut them out. You will now have three pcs the same size, two of thinner paneling and one piece of 1/4" plywood.
Next use your jigsaw to cut out the original tracing from your plywood carefully. Keep the piece you just cut out, you'll be useing it soon.
With your file or sander remove any rough pieces from the paneling and the plywood (inside and outer edges).
Take the inner piece you removed from the plywood and lay it out on the backside of your sherpa or sheepskin lining material and trace it onto the material. Flip over the inner plywood piece and do this a second time so you have two outlined pieces.. Remove this piece of plywood from the work area to avoid confusion, you will not be useing it any longer.
Take the paneling pieces and glue the centered lining to the rough side. Do this for both pieces.
Once the glue has dried, take your sissors and cut the lining material's pile down. Do this cross wise and trim it every other inch or so. If you look at it at eye level you should see hills and valleys. When Finished:This will force the lining material to brush back and forth over your blade when sheathed or drawn. When coupled with some oil in the scabbard it will give you a nice even coating of oil.
Take the thin center 1/2 pc of plywood and glue it to your panel pieces like a sandwich: panelw/lining, plywood, lining w/paneling.
Clamp the pieces together. If you don't have clamps, cord or even tape wrapped aroungd your scabbard will work. Let the glue dry.
Take off your clamps, tape or cord and you finally have something that starts to resembles a scabbard.
Sand or file down the outer glossy edge of the paneling and continue to form the final shape of the core to your satisfaction.
There are a number of ways to attach a leather covering. The easist is to have both a throat and a chape so the center section is pretty much just a glued leather wrap with a throat piece and a chape over the ends. The throat and chape can be either leather or metal.
The next would be a single or double stitched tube with throat and chape.
The cheapest but most difficult is no chape or throat piece. For this you have to cut out two pieces of leather, punch holes all around and then after stitching and turning it rightside out, pull it on like a stocking. Trim your nails before doing this one as you can easily scratch the leather pulling the on.
Even with gluing time and a break or two you can knock off one of these in 4-5 hours start to finish.
I'll add pics later.


