Page 1 of 8
Cold Steel Seax project (continued)
Posted: Sun Apr 01, 2012 12:52 am
by Ringulf
Well folks it has been a while since I have posted any pictures.
It truly has been that busy.
I got through my larp stuff which I will post in the proper area, but I thought I would share with you some of the progress I have made on the seax project.
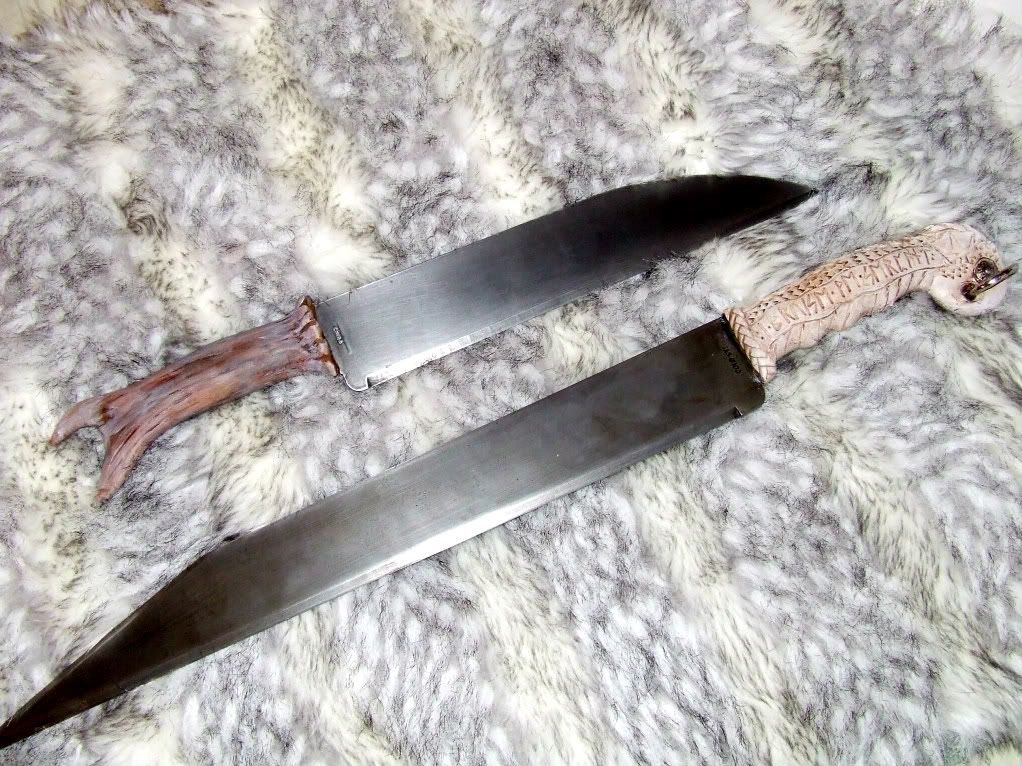
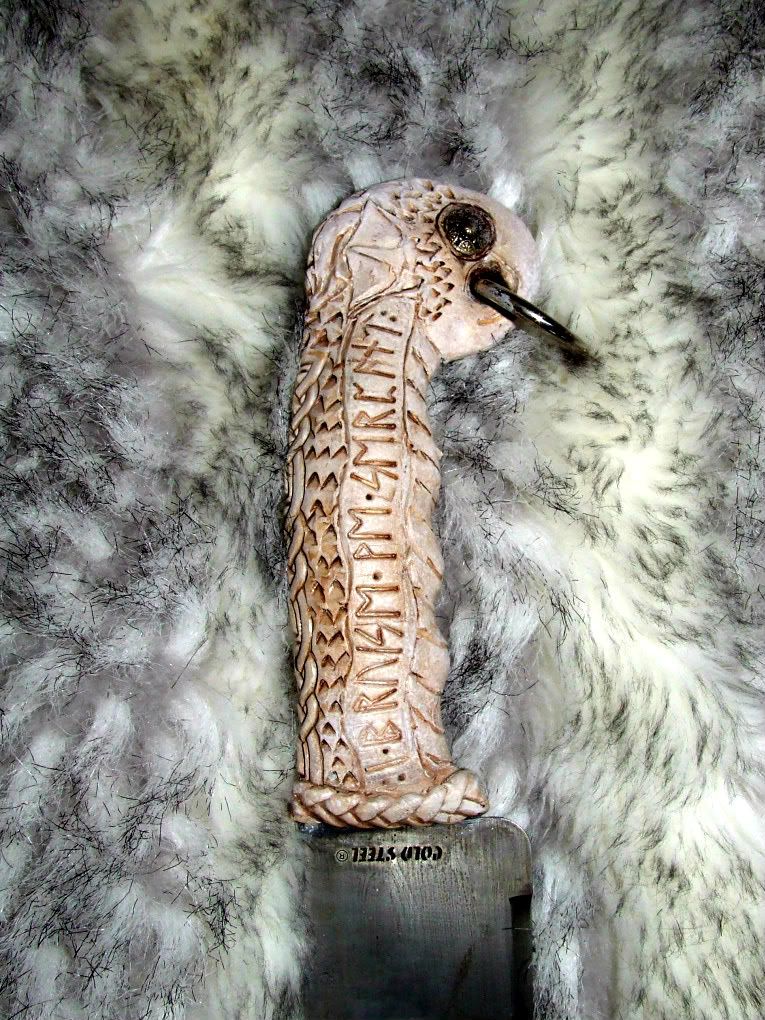
I think you may remember the long seax that I used to kill the rattler and was given a name by my friends and I.
"Ormbani" was made into a broken back seax from its original sheeps foot seax design and I was waiting to get a handle on it.
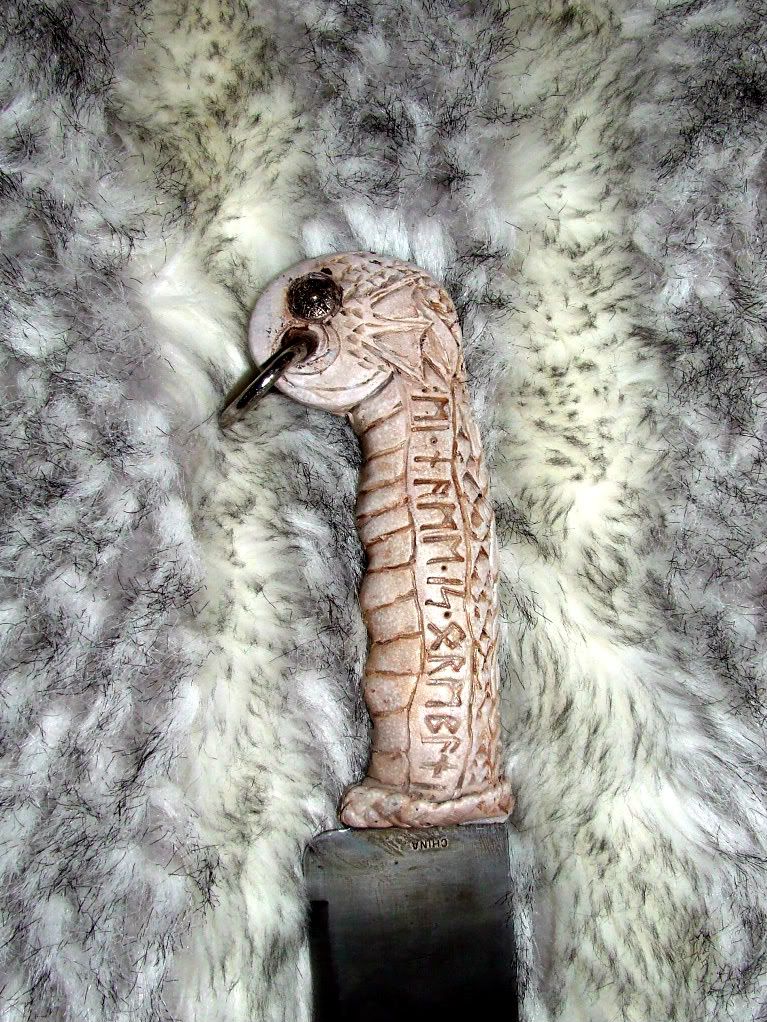
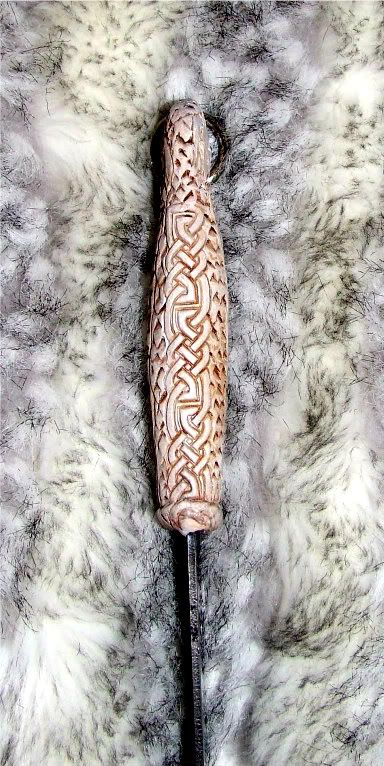
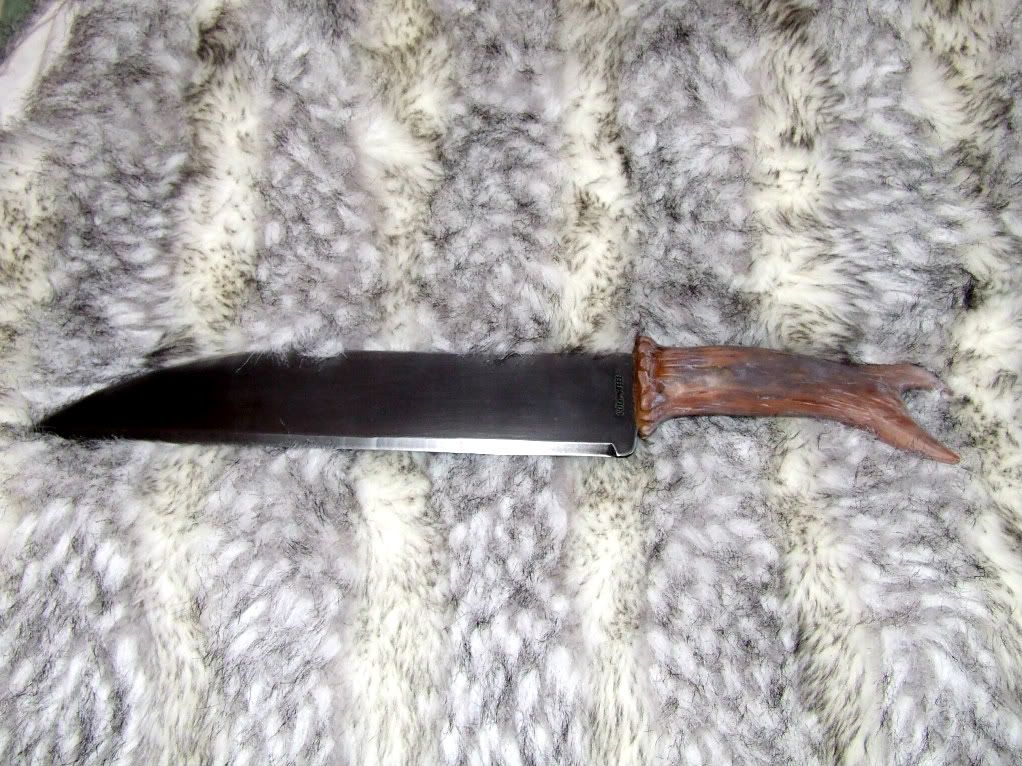
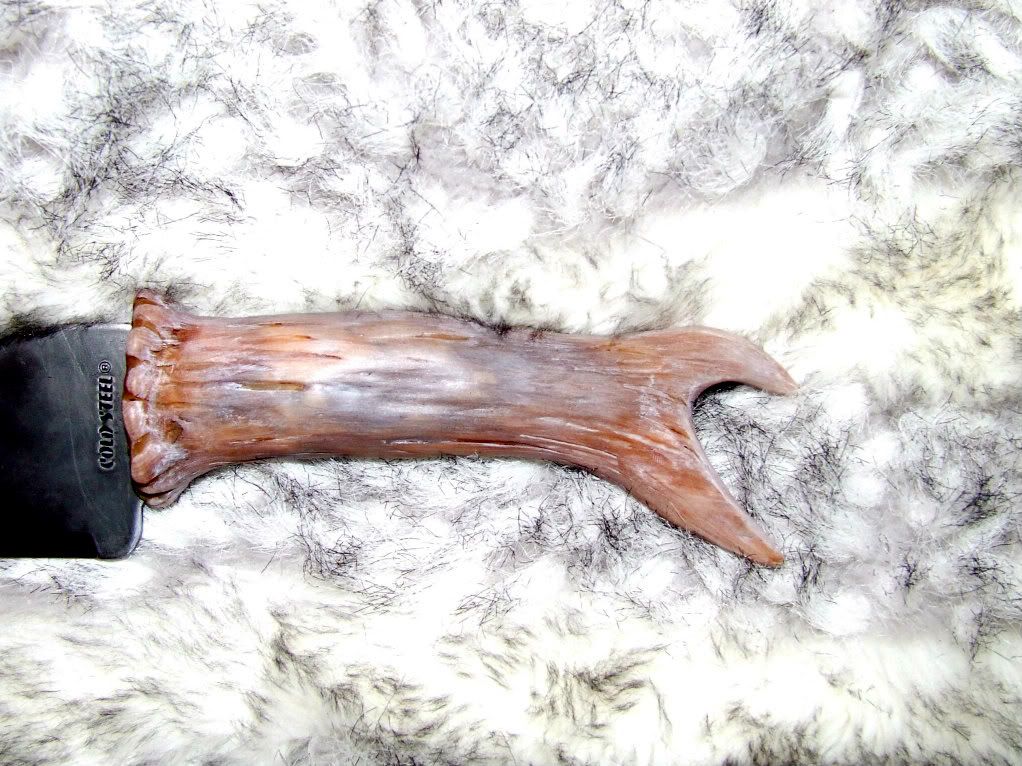
So here it is with handle, and I used the same techniques to construct a handle for our Captain of the Rangers who's persona's last name is Rhienhardt. His device bears a Stag. Of course a stag is hard to put on a handle as the big spindly antlers are what makes it who he is, so I made that the focus instead.
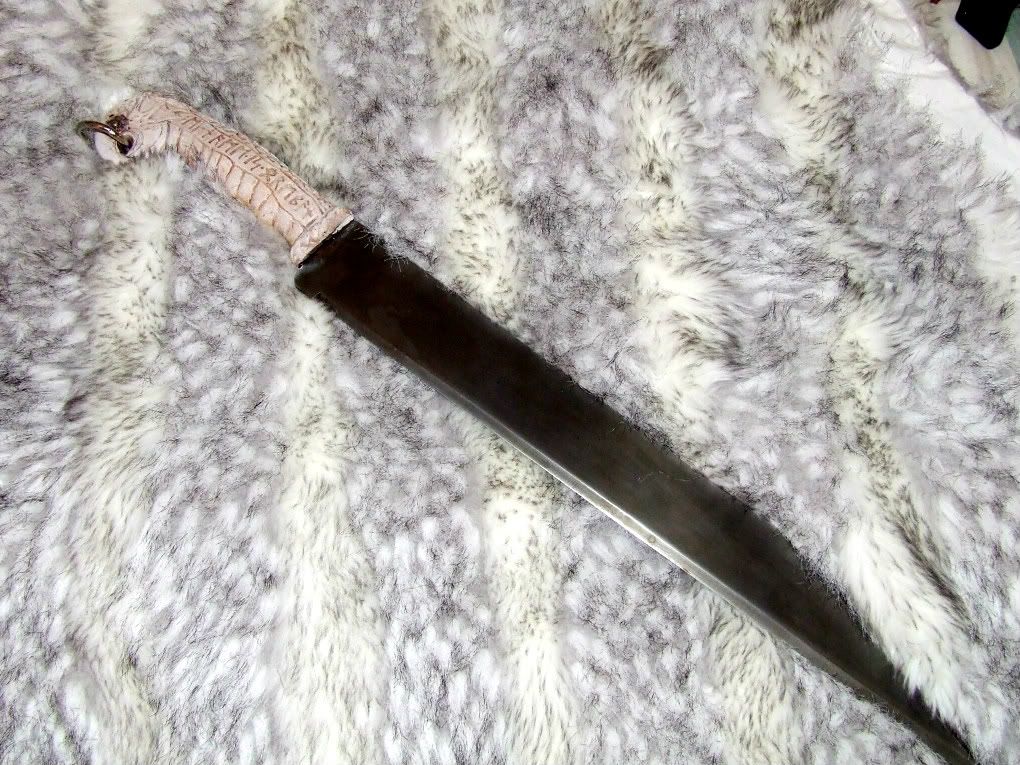
I included both sides so you could see the inscription on Ormbani. They will all get scabbards and I have quite a few more in the works as thankyou presents for some of the marshals and staff of the Ranger Moot. (just two weeks away!!)
I have some other fun stuff to show you including a spear, shield, bow and quiver.
If I ever get the hood to come out properly that may be on the list too.

Re: Cold Steel Seax project (continued)
Posted: Sun Apr 01, 2012 1:16 am
by Ernildir
Beautifully done! I love the antler hilt.
Re: Cold Steel Seax project (continued)
Posted: Sun Apr 01, 2012 1:22 am
by Manveruon
VERY nice! I can't wait to see the pictures of the other items you mentioned as well!
Re: Cold Steel Seax project (continued)
Posted: Sun Apr 01, 2012 2:11 am
by kaelln
As usual, just awesome!
Re: Cold Steel Seax project (continued)
Posted: Sun Apr 01, 2012 5:18 am
by E.MacKermak
I am stealing the idea of reshaping the blade to a broken back. I really like the look of that one.
Re: Cold Steel Seax project (continued)
Posted: Sun Apr 01, 2012 1:15 pm
by Gondian
WOW!! Those are awesome!!!!!
Re: Cold Steel Seax project (continued)
Posted: Sun Apr 01, 2012 3:16 pm
by Peter Remling
Love the carved handle on the broke back, Absolutely Stunning !!
Re: Cold Steel Seax project (continued)
Posted: Sun Apr 01, 2012 4:54 pm
by Willrett
they look great I just picked up another one of each size.
Re: Cold Steel Seax project (continued)
Posted: Sun Apr 01, 2012 10:30 pm
by Ringulf
Were did you get the 12" it seems like they are getting harder to get now and are up to 11.00. Most are back up to being in the 20.00 range.
There were no more 12" on the special projects site so I was hunting for a descent price for a dozon or so.
Re: Cold Steel Seax project (continued)
Posted: Mon Apr 02, 2012 2:01 am
by Rhys ap Ieuan
Absurdly awesome, as it usual for you. How did you attach the handles?
Re: Cold Steel Seax project (continued)
Posted: Mon Apr 02, 2012 2:58 am
by Ringulf
Well with that question Friend Rhys, I suppose the cat is out of the bag!
Both of these handles are made from a material that is starting to be touted as the new miracle material for knife scales and handles! (Hee hee) I really never thought of using the stuff for this purpose but when I saw this:
http://www.knifescales.com/
I realised that since I had already been working with Polymer Clay doing many forms of sculpture and carving (it is great for both the additive and the diminutive techniques) I really should try it.
The handles are formed and sculpted right on to the tangs and since the Cold Steel seax has that little "bird's beak" at the end, the handle needs no other fastening. The material even permiates the holes in the tang acting like integral "pins".
The whole piece is then put in the oven and baked (the tricky part) and after the right timing as per thickness of the material, it sets very hard but not brittle. The tines on the antler are for the most part as strong as the real thing.
Color is somewhat tricky because you can "Mix" PC with all its different colors like an artists palette but the longer you bake it the darker it gets. a controled baking, for light colors, may require heat shields of tin foil on thinner peices while the thicker peices still cure.
At the end of the day I realize that this stuff is fantastic to work with and makes a great looking piece. It is not period craftsmanship but can be made to look like it at a fraction of the cost. It can teach many of the period carving and sculpting techniques or serve as a prototype for a more expensive peice as well as being very green as walrus ivory and antler and samboc stag is getting kinda pricey and scarce!
Knowing how to do it the real way is my goal and I can do alot of that now though I am ever learning, but when you don't have the funds or the materials or the time you do what you can, besides...it is fun!

Re: Cold Steel Seax project (continued)
Posted: Mon Apr 02, 2012 12:19 pm
by Willrett
i ordered mine from special projects a few weeks ago they still had both at the time.
Re: Cold Steel Seax project (continued)
Posted: Mon Apr 02, 2012 8:47 pm
by Mirimaran
Outstanding work, and resourceful too!

looking forward to the quiver pics!
Ken
Re: Cold Steel Seax project (continued)
Posted: Mon Apr 02, 2012 11:41 pm
by Rhys ap Ieuan
How 'bout that! My wife works with the stuff a bit, making things to sell at SCA events & such. Your results are amazing - they really look natural in the photos!
Re: Cold Steel Seax project (continued)
Posted: Wed Apr 04, 2012 4:54 pm
by Ernildir
I recently picked up one of the 18"s and have been thinking about how I want to do the hilt. Would it be reasonable/effective to simply (after removing the plastic hilt) make a thick wrapping of layers of leather? Was it ever done like that back in the day?