Ceadmon/Ringulf Costrel project
-
sgainbrachta
- Silent Watcher over the Peaceful Lands
- Posts: 152
- Joined: Fri Nov 16, 2012 5:33 am
- Location: Reno, Nevada, USA
Re: Ceadmon/Ringulf Costrel project
Lookin' good!

Re: Ceadmon/Ringulf Costrel project
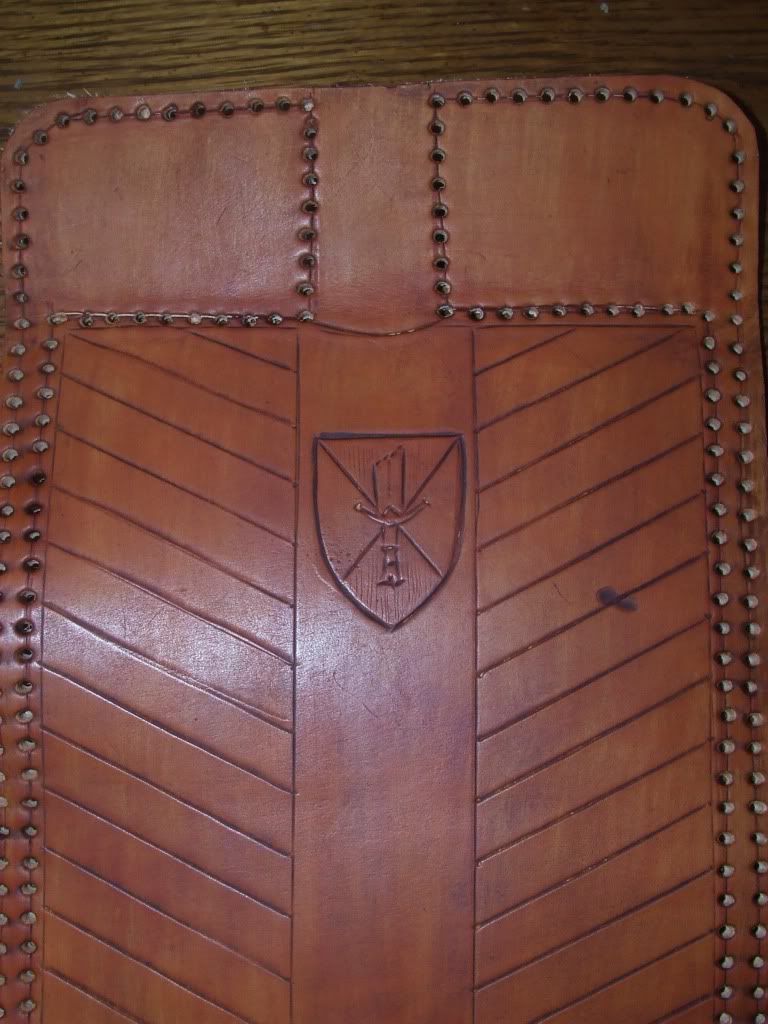
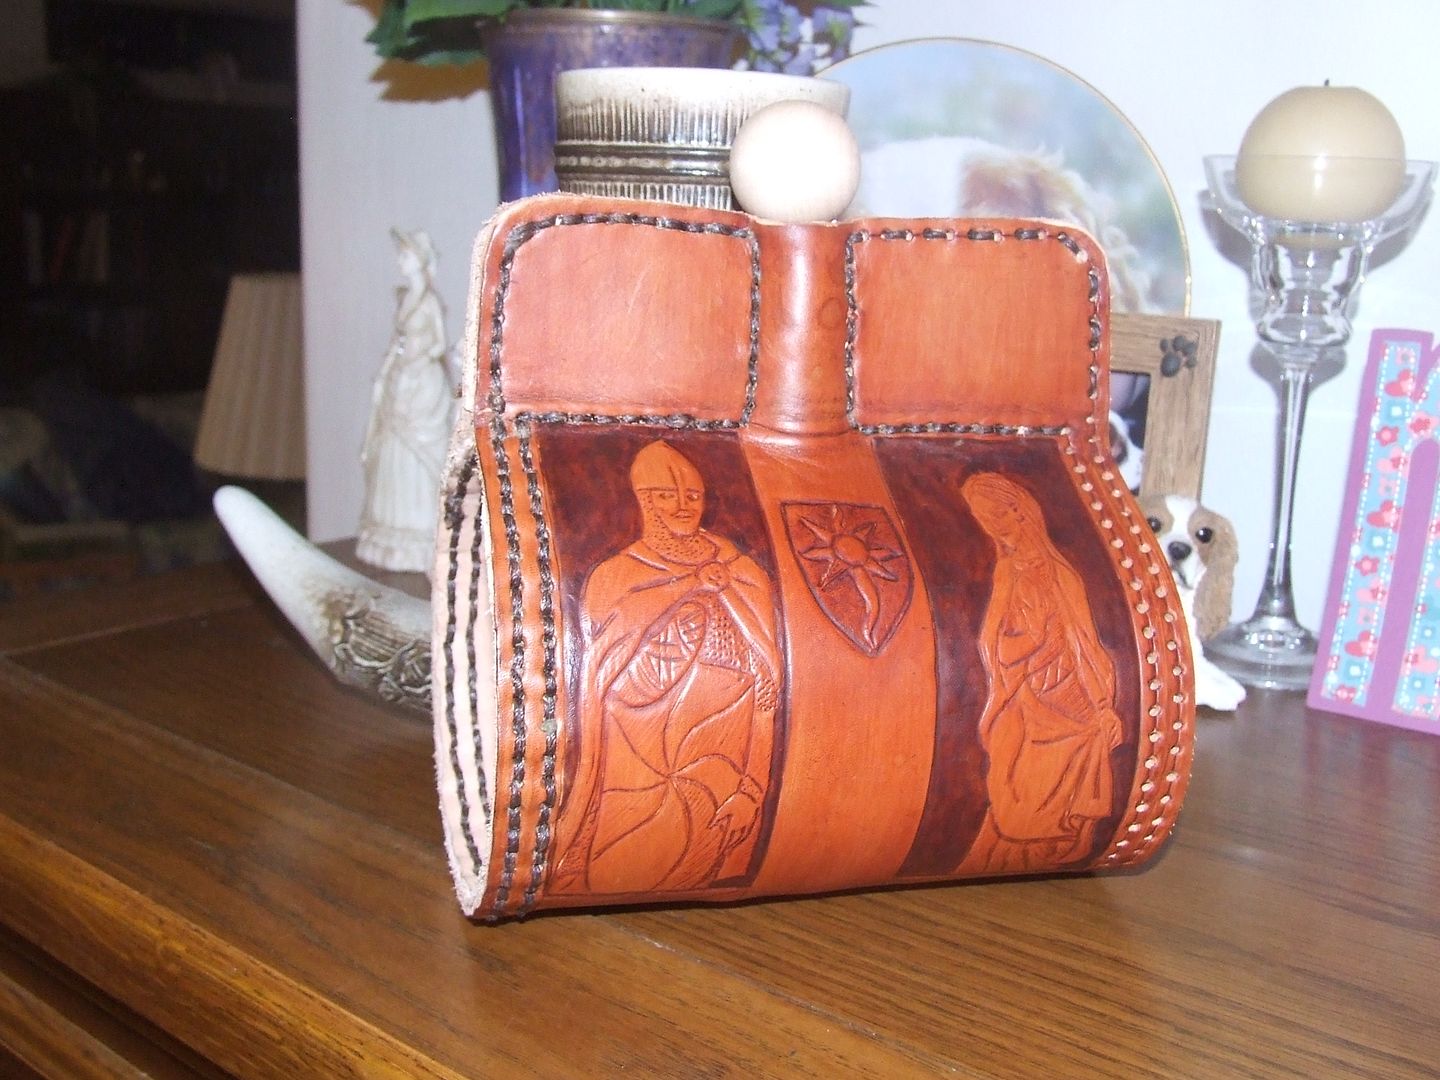
Finally felt well enough to tackle some tooling!
And the costrels go on!
This is the Beren and Luthien designs.
I did a dark brown stain on the window backgrounds so that when they are stained later on they will pop.

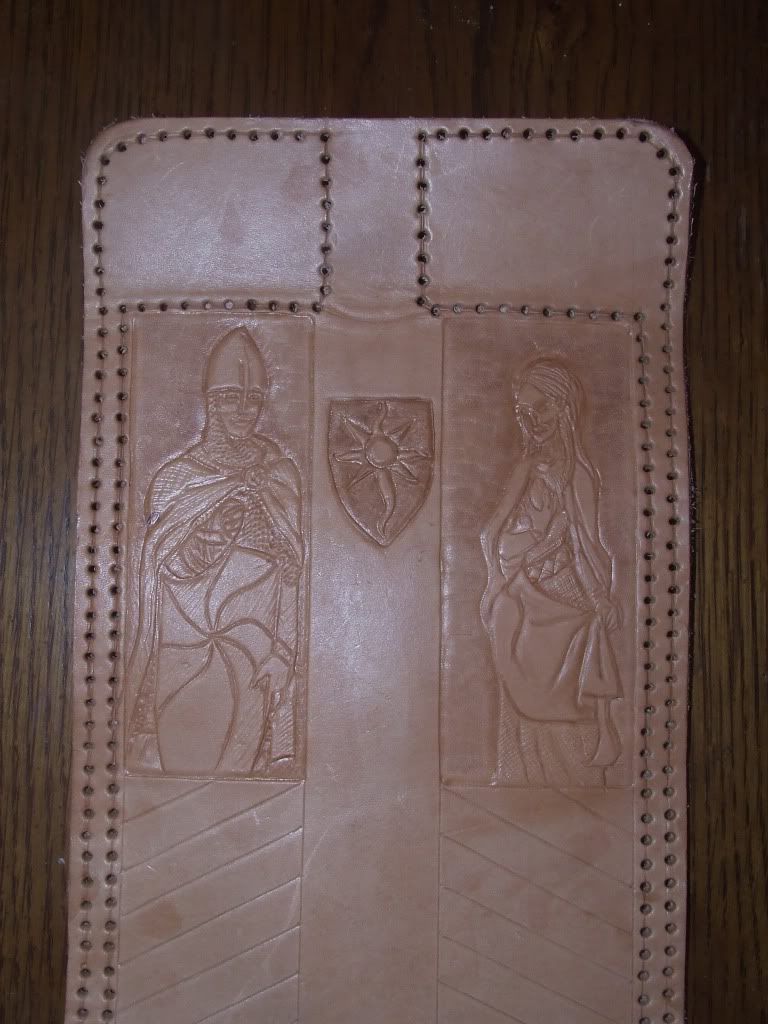
Now that I have them sized properly it is going pretty well. I really enjoy this type of tooling and Ceadmon's drawings are superb and very easy to work with!

And the costrels go on!
This is the Beren and Luthien designs.
I did a dark brown stain on the window backgrounds so that when they are stained later on they will pop.
Now that I have them sized properly it is going pretty well. I really enjoy this type of tooling and Ceadmon's drawings are superb and very easy to work with!
I am Ringulf the Dwarven Woodsman, I craft leather, wood, metal, and clay,
I throw axes, seaxes, and pointy sticks, And I fire my bow through the day.
Come be my ally, lift up your mead! We'll search out our foes and the Eagles we'll feed!
I throw axes, seaxes, and pointy sticks, And I fire my bow through the day.
Come be my ally, lift up your mead! We'll search out our foes and the Eagles we'll feed!
Re: Ceadmon/Ringulf Costrel project
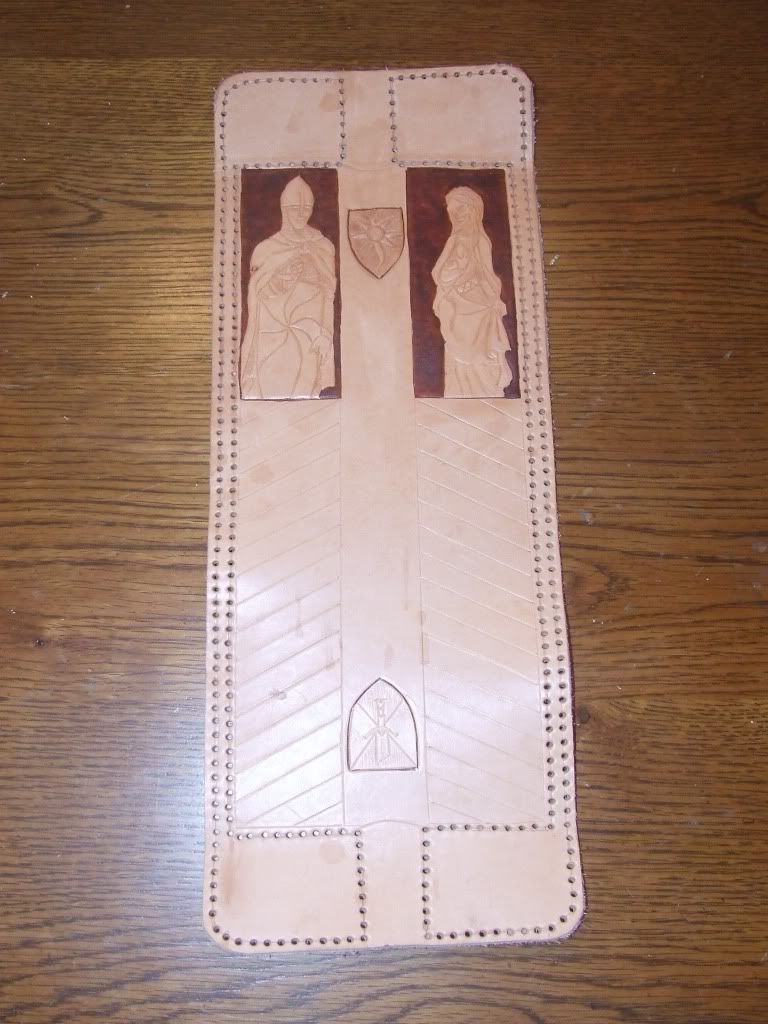
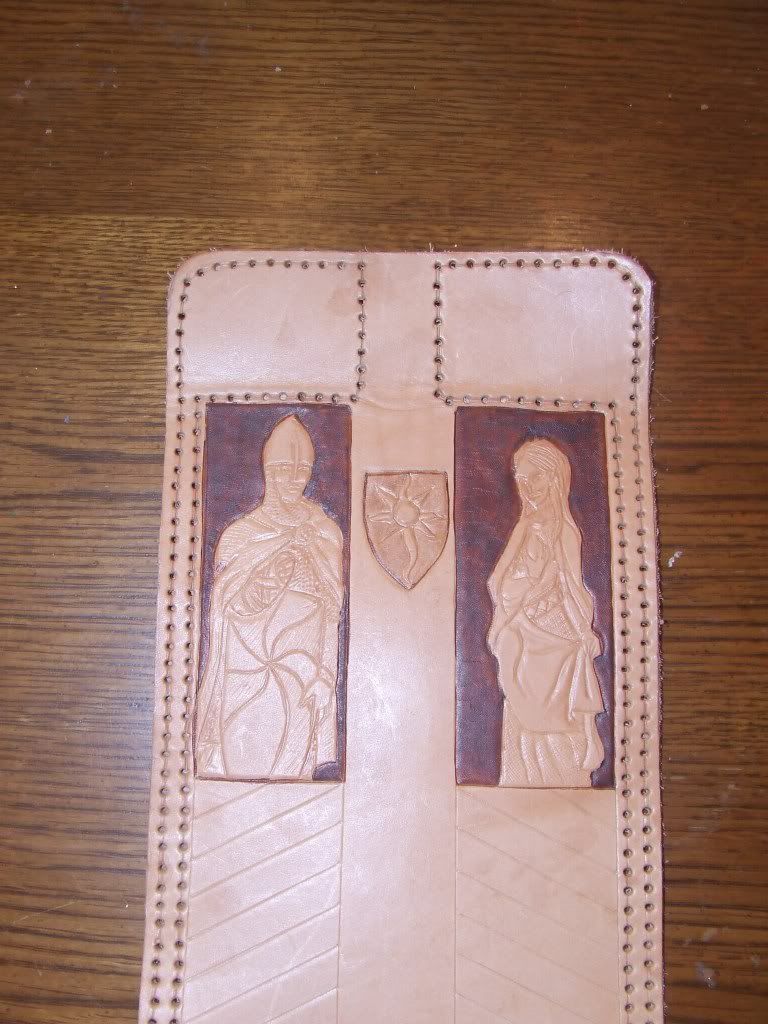
And this is the peice after the second staining.
Jack if you would just drop me a note to let me know if this is ok or not, It will get a bit darker once I rub the finish on it, so bear that in mind.

Jack if you would just drop me a note to let me know if this is ok or not, It will get a bit darker once I rub the finish on it, so bear that in mind.
I am Ringulf the Dwarven Woodsman, I craft leather, wood, metal, and clay,
I throw axes, seaxes, and pointy sticks, And I fire my bow through the day.
Come be my ally, lift up your mead! We'll search out our foes and the Eagles we'll feed!
I throw axes, seaxes, and pointy sticks, And I fire my bow through the day.
Come be my ally, lift up your mead! We'll search out our foes and the Eagles we'll feed!

Re: Ceadmon/Ringulf Costrel project
Absolutely fantastic work! I can't wait to see the finished product! I really want to start doing some projects like this of my own, but I haven't mustered up the courage just yet, haha.
Maerondir Perianseron, also called “Mickel,” Halfling Friend - Ranger of the Misty Mountains

Re: Ceadmon/Ringulf Costrel project
let me pull my jaw off the floor.
-Jack Horner
----------------------------
Impression: Cædmon Reedmace | bronze founder living in Archet, Breeland. c. 3017
----------------------------
Impression: Cædmon Reedmace | bronze founder living in Archet, Breeland. c. 3017
Re: Ceadmon/Ringulf Costrel project
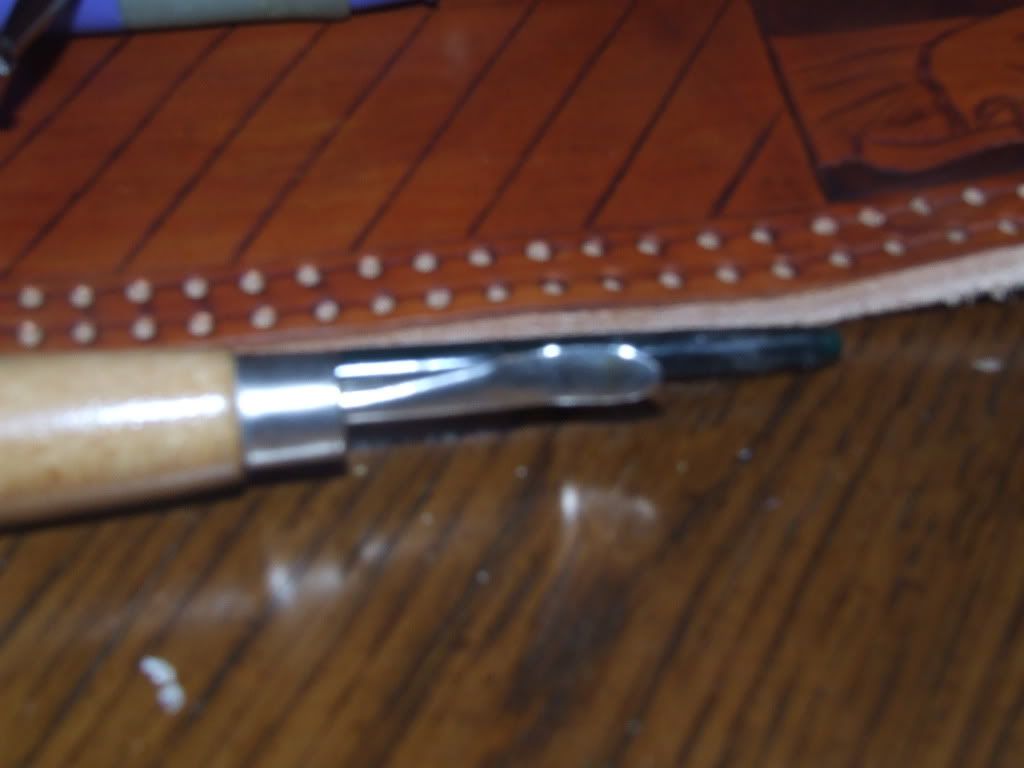
I also promised a look at the tools I use as I go along.
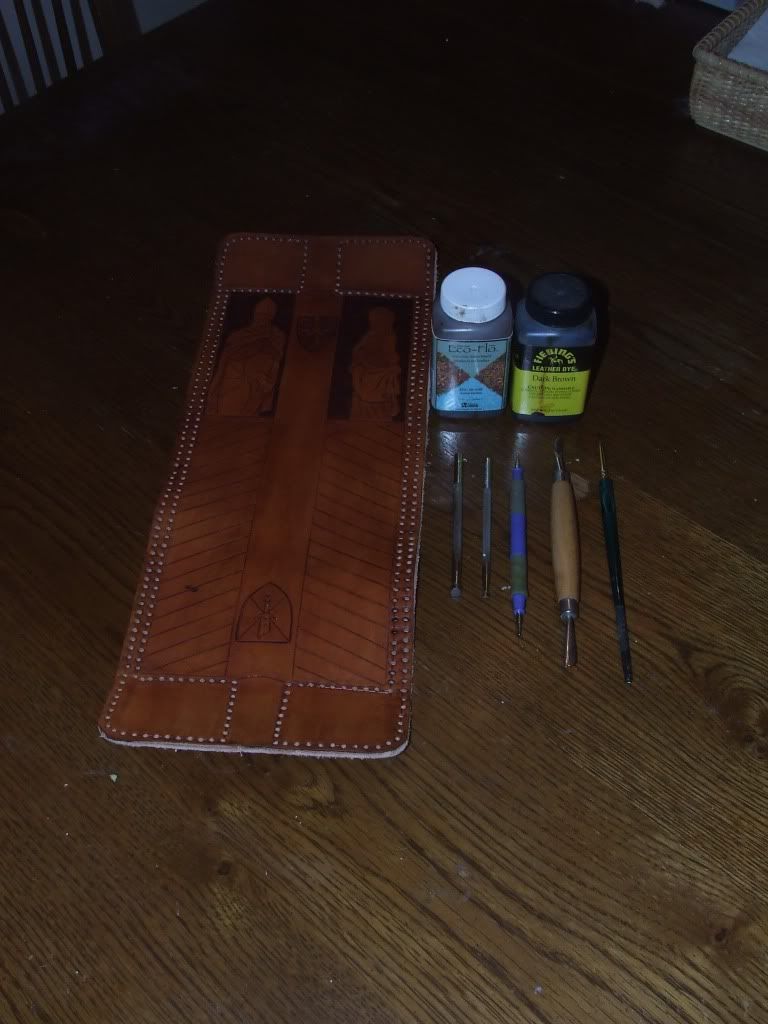
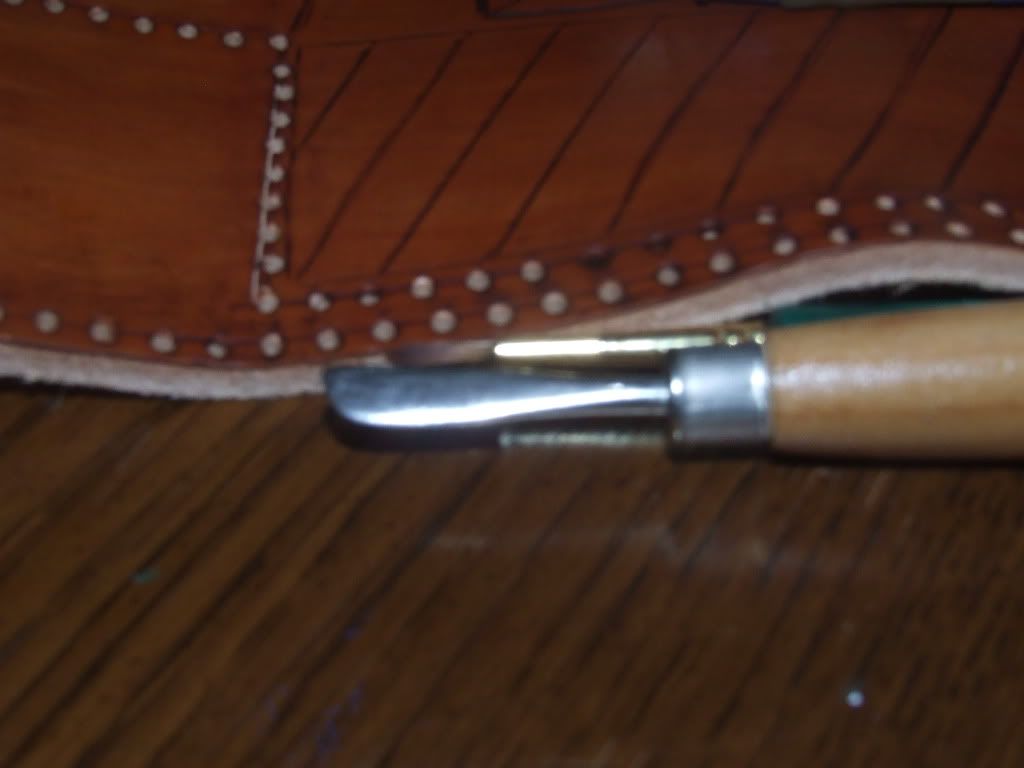
For most of the tooling, I use one tool to do the majority of the work and that is that two ended Knife/Spoon tool. The knife cuts the outlines and bevels and the spoon end is used to draw back from the cut. It also contures the leather and depresses other areas so that you are able to creat a 3D effect. Start with the deepest part of the picture and move out like you were dressing the figure.
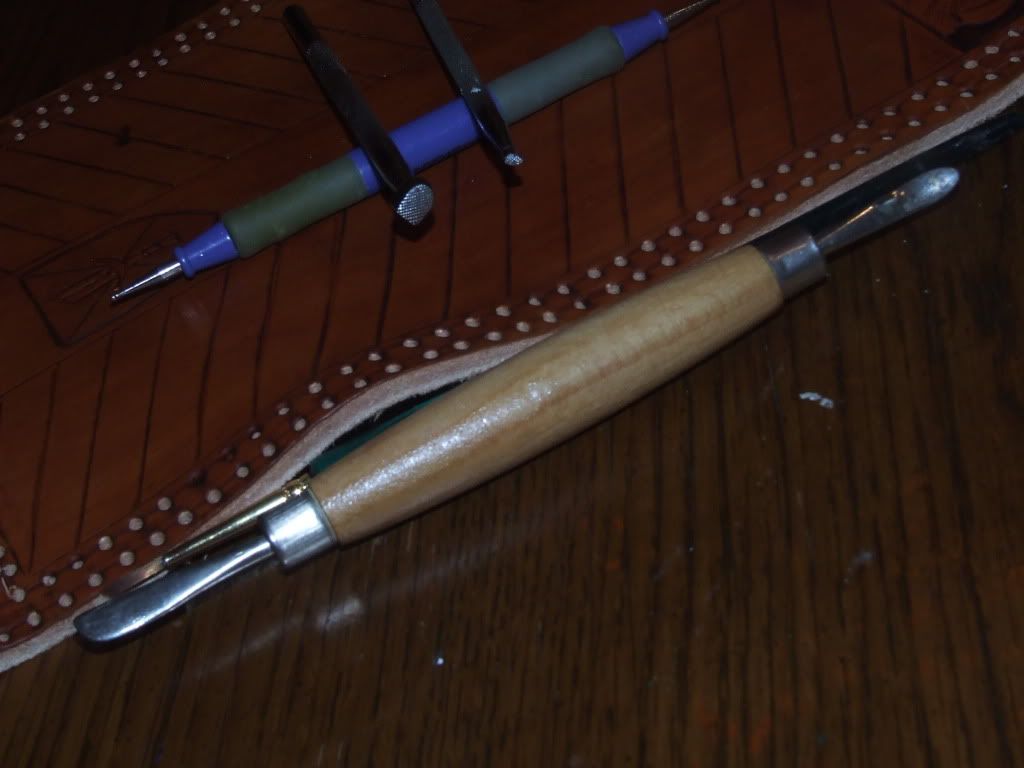
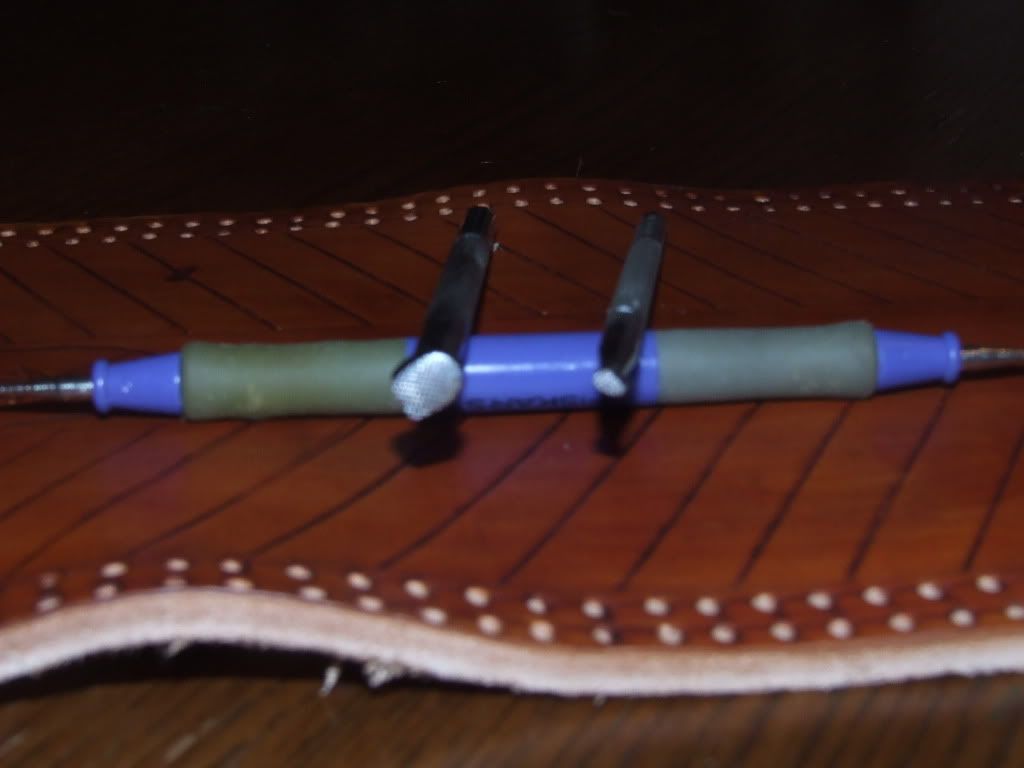
The other tool I use alot for this type of figure tooling, is a small stylus, the type normaly used for embossing.
(The grey and blue tool under the stamps)
At the end of the two tips, there are two different sized balls. These are great for drawing lines and "sketching" on the leather. If you keep the leather moist with a sponge you can use the ball point to draw without catching or slicing the leather. Of course the little ball makes the thinner line but it won't be as sharp or difinitive as the knife tool.
The stamping tools I have here, are called backgrounders. After you have pulled out the conture from the outline of the figure, to make it stand forward from the background, you can use these small, crosshatched tools to make a textured background. the little one gets into small spaces and the big one covers larger areas. The tricky part of this step is to try to keep your pressure even over the whole area so you don't get individual stamp marks but leave the area all at the same level. Hammered or hand pushed makes no difference consistancy is the key.
I used two different types of leather dye for this stage. The Fiebings is an alchohol based product with very good saturation and even brushing qualities. So not so many streaks and good rich color.
The Eco-Flo is a water based product and is easily thinned to get a lighter coverage. This however is a bit more difficult to keep from streaking, so a damp sponge is used as soon as it is applied to soften any streaks and rub in a nice consistant coat.
This will also pick up and lighten the higher spots giving the effect of "highlights" the way dry brushing with paint would.
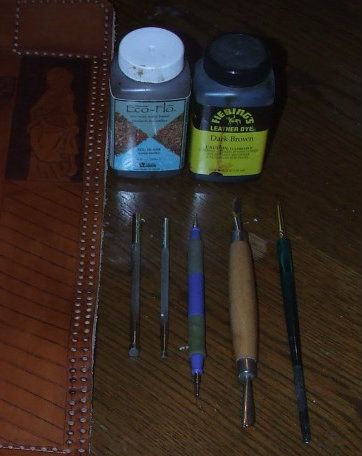
I get it all from Tandy, I actually got the knife/spoon tool at Hobby Lobby in the leather section but it is all Tandy products anyway.
Have fun!
For most of the tooling, I use one tool to do the majority of the work and that is that two ended Knife/Spoon tool. The knife cuts the outlines and bevels and the spoon end is used to draw back from the cut. It also contures the leather and depresses other areas so that you are able to creat a 3D effect. Start with the deepest part of the picture and move out like you were dressing the figure.
The other tool I use alot for this type of figure tooling, is a small stylus, the type normaly used for embossing.
(The grey and blue tool under the stamps)
At the end of the two tips, there are two different sized balls. These are great for drawing lines and "sketching" on the leather. If you keep the leather moist with a sponge you can use the ball point to draw without catching or slicing the leather. Of course the little ball makes the thinner line but it won't be as sharp or difinitive as the knife tool.
The stamping tools I have here, are called backgrounders. After you have pulled out the conture from the outline of the figure, to make it stand forward from the background, you can use these small, crosshatched tools to make a textured background. the little one gets into small spaces and the big one covers larger areas. The tricky part of this step is to try to keep your pressure even over the whole area so you don't get individual stamp marks but leave the area all at the same level. Hammered or hand pushed makes no difference consistancy is the key.
I used two different types of leather dye for this stage. The Fiebings is an alchohol based product with very good saturation and even brushing qualities. So not so many streaks and good rich color.
The Eco-Flo is a water based product and is easily thinned to get a lighter coverage. This however is a bit more difficult to keep from streaking, so a damp sponge is used as soon as it is applied to soften any streaks and rub in a nice consistant coat.
This will also pick up and lighten the higher spots giving the effect of "highlights" the way dry brushing with paint would.
I get it all from Tandy, I actually got the knife/spoon tool at Hobby Lobby in the leather section but it is all Tandy products anyway.
Have fun!
I am Ringulf the Dwarven Woodsman, I craft leather, wood, metal, and clay,
I throw axes, seaxes, and pointy sticks, And I fire my bow through the day.
Come be my ally, lift up your mead! We'll search out our foes and the Eagles we'll feed!
I throw axes, seaxes, and pointy sticks, And I fire my bow through the day.
Come be my ally, lift up your mead! We'll search out our foes and the Eagles we'll feed!
Re: Ceadmon/Ringulf Costrel project
Just awesome! Magnificent work!

Re: Ceadmon/Ringulf Costrel project
Hey Ringulf, when you stained the darker parts I don't suppose you used a resist on the unstaine parts because you later stained them. Did you just "paint" the stain on with a paint brush, being careful not to touch the parts that you didn't want dark? I'm asking because I've made some vambraces that I'll have to show later and my staining results were far less than desirable. I talked to the salesman at Tandy and got some pointers on how to do it next time.
Great work, by the way. I'd love to see how these are coming.
Great work, by the way. I'd love to see how these are coming.
Ichthean Forge (pronounced Ick thee an). Maker of knives, and primitive camping gear.
Re: Ceadmon/Ringulf Costrel project
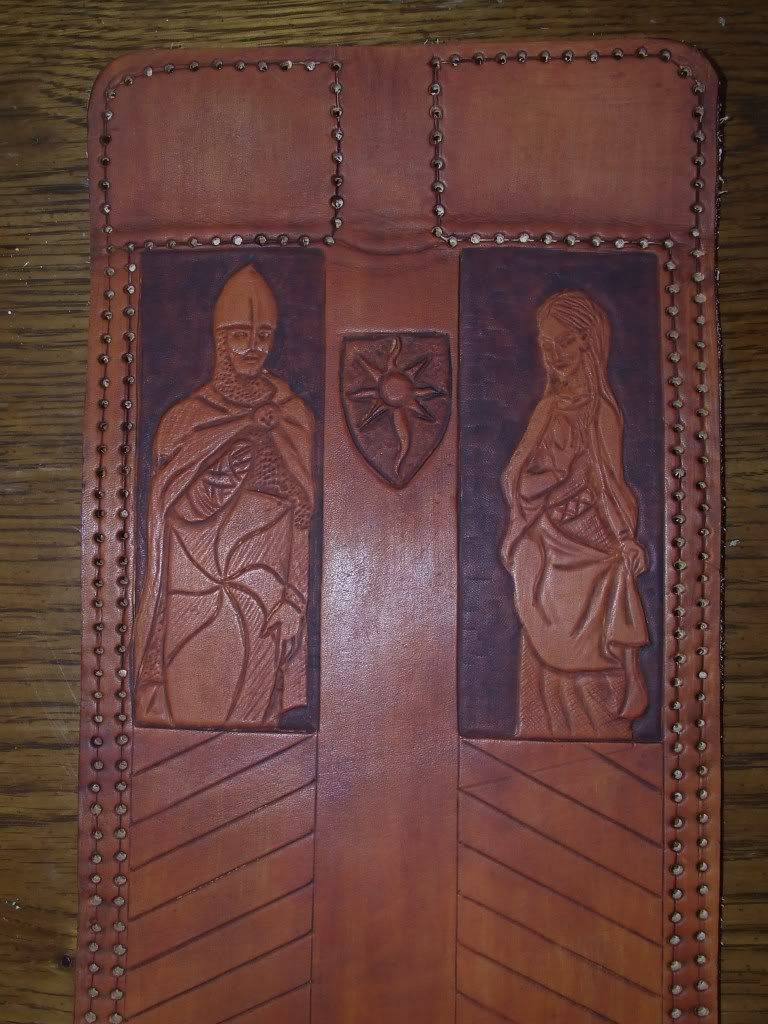
Yes Eric that is the way I have been doing my backgrounds lately, just a paint brush and the stain. if you are careful and cut acurately when using the swivel knife it makes a little moat that keeps the stain from the highlighted piece I have some other peices I have done recently this way as well and I shall have more up on the costrels very soon.
I devised a way of making the end caps in a press so that they insert and sew properly so my major fear is all but conquered now!
I devised a way of making the end caps in a press so that they insert and sew properly so my major fear is all but conquered now!
I am Ringulf the Dwarven Woodsman, I craft leather, wood, metal, and clay,
I throw axes, seaxes, and pointy sticks, And I fire my bow through the day.
Come be my ally, lift up your mead! We'll search out our foes and the Eagles we'll feed!
I throw axes, seaxes, and pointy sticks, And I fire my bow through the day.
Come be my ally, lift up your mead! We'll search out our foes and the Eagles we'll feed!
Re: Ceadmon/Ringulf Costrel project
Great! Thanks for the info. Looking forward to seeing what you've got. It's always great to learn new ways to do a better job.
Ichthean Forge (pronounced Ick thee an). Maker of knives, and primitive camping gear.
Re: Ceadmon/Ringulf Costrel project
Sorry all and especially Ceadmon for the slowdown on this project but I will be honest. In doing my Odin Head leather bottle I came to a point were all that was good about the project went south because I could not forsee some of the things the leather would do when sewn up and wet. Well that made me kinda squeemish when it came to putting the ends on the costrels, I had done some nice work up to that point in the tooling and decoration and did not want to mess it up not knowing exactly the best way to shape, punch and sew the ends in.
I wrapped my head around it for weeks and researched and schemed and finally it came to me and I went forward. This is how I tend to work at times, I get a bit ahead of myself with a surge of enthusiasm and bravery/foolhardyness
And realize am am in uncharted water. (It reminds me of Arathor with the Orcs at the end of Born of Hope!)
As you will see from the pictures I have come to a strategy and I think it has worked out nicely. I am only waiting now to seal the interior and sew on the other end. The other two are punched and tooled save for the figures and will all be ready pretty soon.
(BTW Jack, did you get my last pm about the sealing? give me a shout I had a few questions in it we shold discuss)
So, on to the pics!
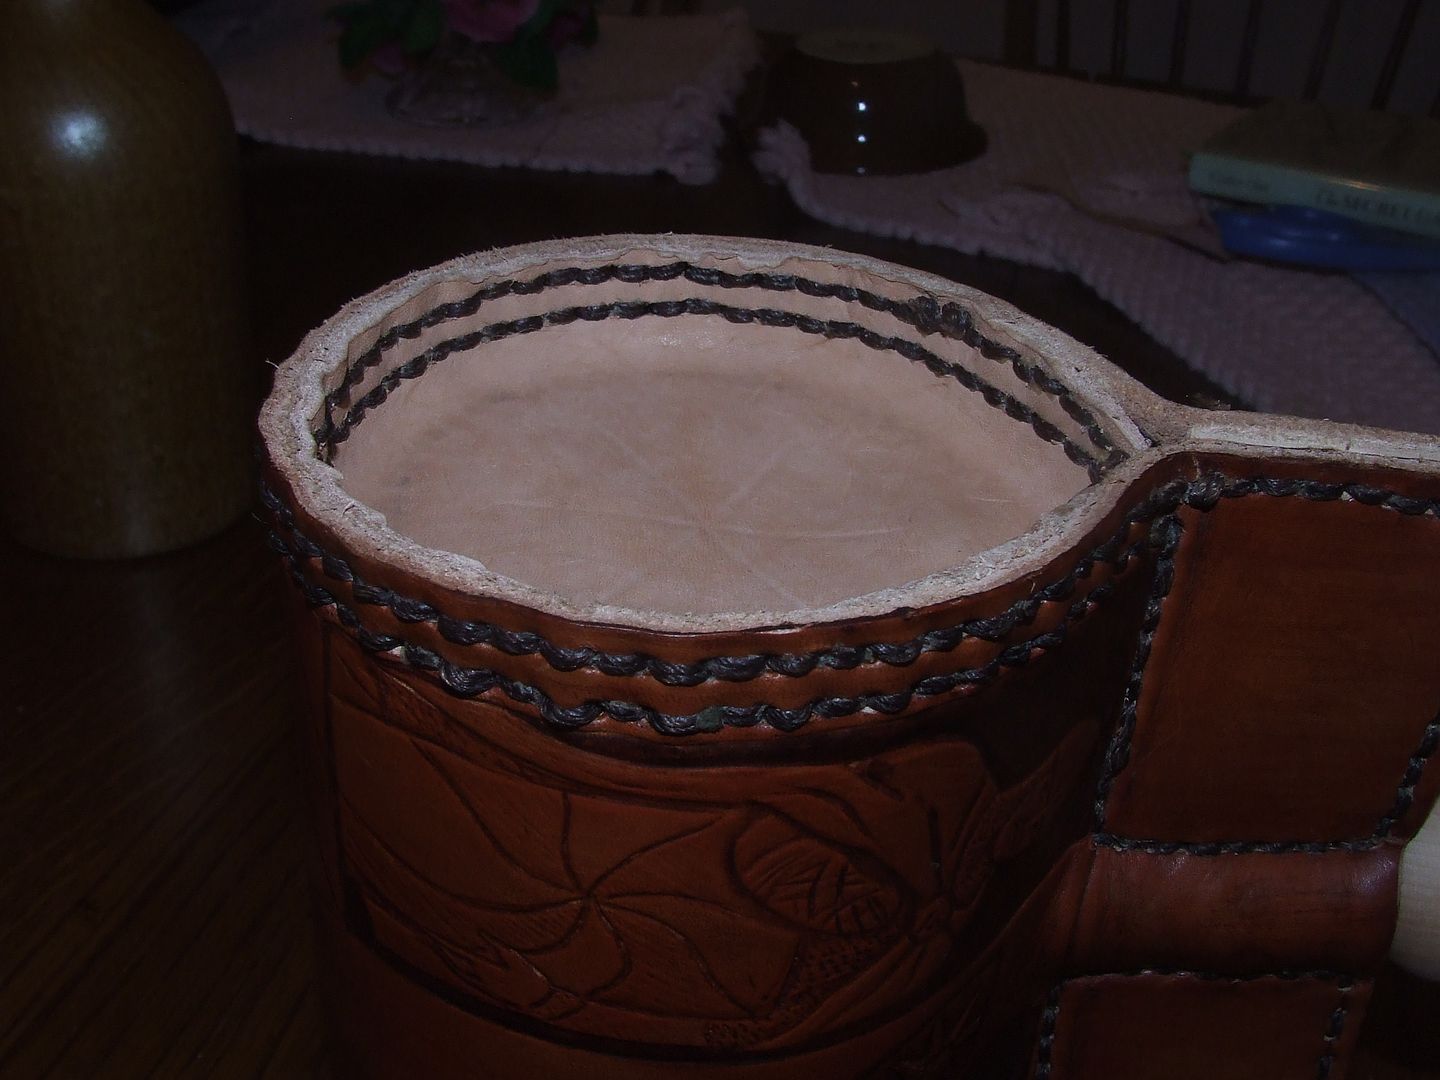
Two shots showing the costrel stitched in the round and starting to see the way the end is stitched

This is now the way I make the insert for the end piece, note on the two top "ears" of the costel next to the spout that I have added leather spacers to thicken up these areas. The reasoning here is twofold. First off you want these stiffer and thicker for the strapping you will use to hang the costrel full of liquid. Secondly the spout need a bit of space to widen out to a round even if you stretch the front and back pieces of leather.
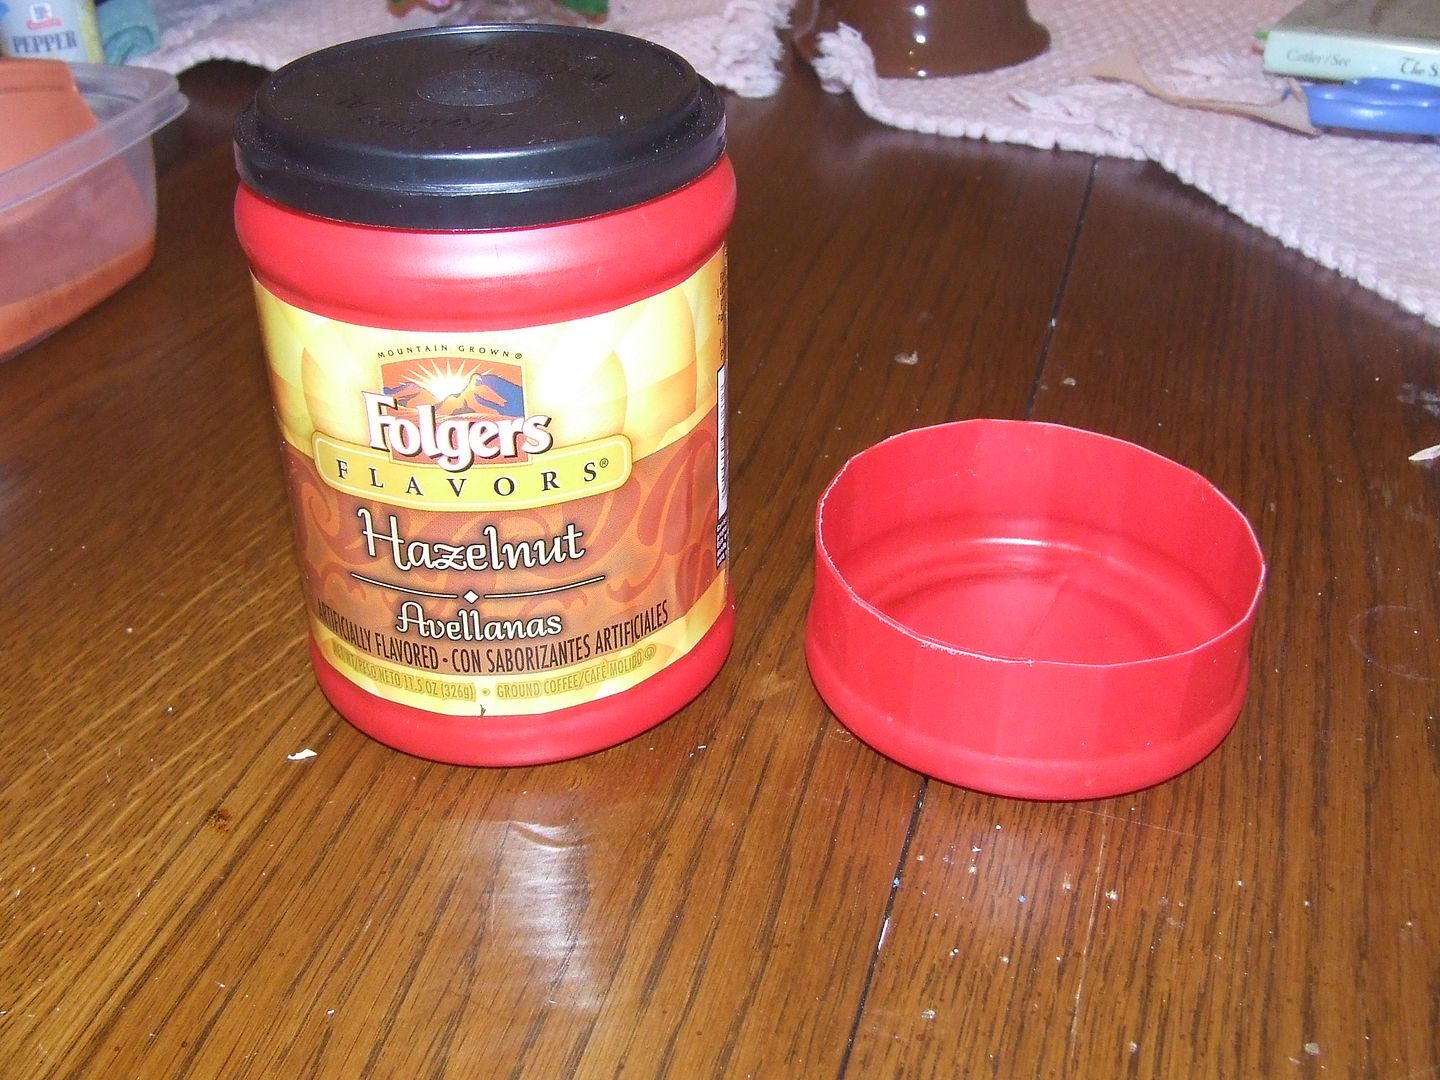
This costrel was based on a one quart, inside, fluid measurment and my trusty old Folgers can was what was used to determin that. As that was the case I used the ends of the can to make the mold to press the wet leather circles in and form the end insert.
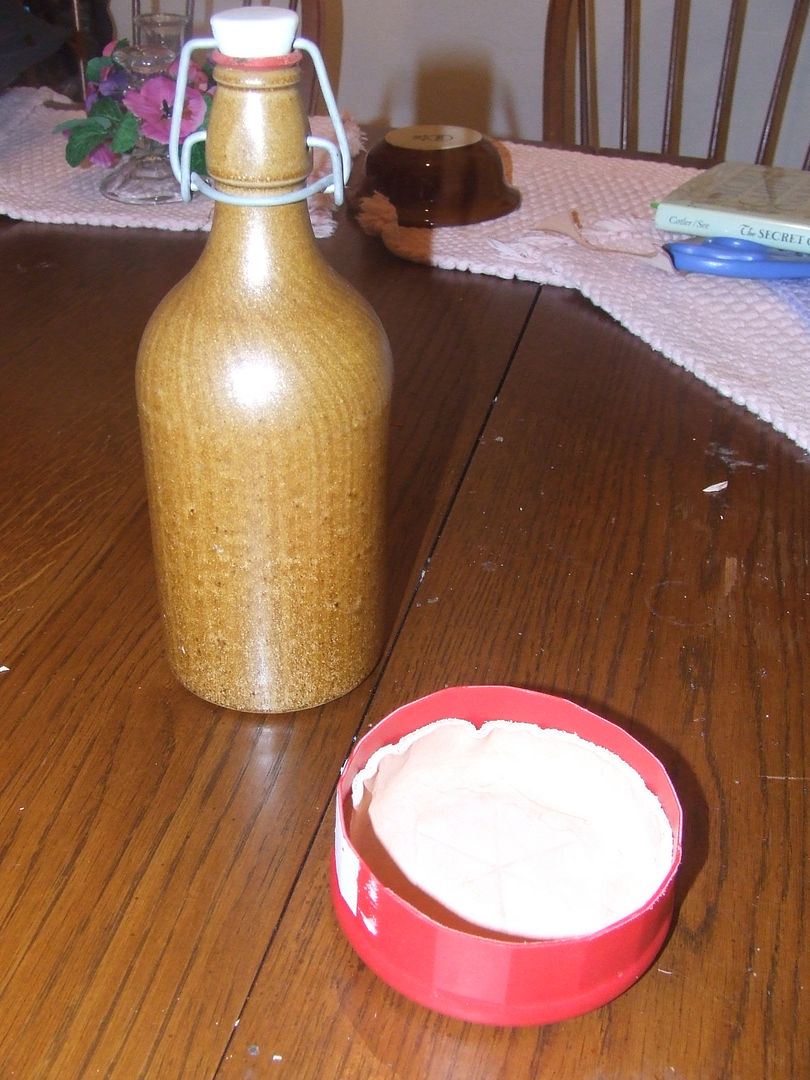
The earthenware bottle, when filled with water, became the perfect pestle to shape the leather against the plastic can bottom.
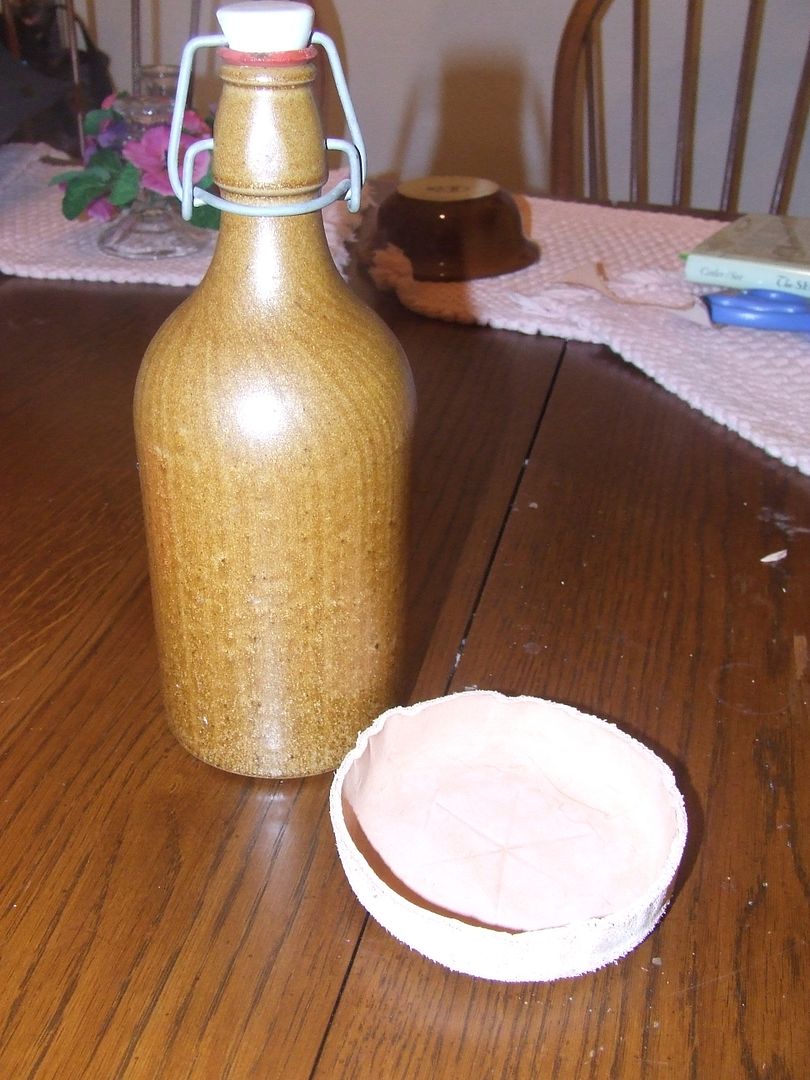
This is the insert after it has dried out, but before it has been punched

In this project my holes are already punched in the costrel body, so I need to just make sure that the flange of the cup-like insert covers both rows of holes. When I am sure of that I use some leather "hyde glue" and adhere it right in place. I then use a star wheel punch to punch through the existing two rows of holes from the body into the flange and then stitch it in place.
This method made it so much easier to make the insert and keep it from getting all crinckly. it compressed and expanded to make a nice even cup.
I know most of you will be saying to yourselves, "Well Duh! Yeah Scott what was the big problem?" Well folks, I am afraid that is just the way I problem solve. Lots of hours staring at it, rolling it around in my mind, trying different ideas in my head and then getting up the nerve to try it!
Sometime it's quick, and sometimes I feel like Gandalf at the West Gate of Moria.
Eventually though, I get my Frodo!
I wrapped my head around it for weeks and researched and schemed and finally it came to me and I went forward. This is how I tend to work at times, I get a bit ahead of myself with a surge of enthusiasm and bravery/foolhardyness
And realize am am in uncharted water. (It reminds me of Arathor with the Orcs at the end of Born of Hope!)
As you will see from the pictures I have come to a strategy and I think it has worked out nicely. I am only waiting now to seal the interior and sew on the other end. The other two are punched and tooled save for the figures and will all be ready pretty soon.
(BTW Jack, did you get my last pm about the sealing? give me a shout I had a few questions in it we shold discuss)
So, on to the pics!
Two shots showing the costrel stitched in the round and starting to see the way the end is stitched
This is now the way I make the insert for the end piece, note on the two top "ears" of the costel next to the spout that I have added leather spacers to thicken up these areas. The reasoning here is twofold. First off you want these stiffer and thicker for the strapping you will use to hang the costrel full of liquid. Secondly the spout need a bit of space to widen out to a round even if you stretch the front and back pieces of leather.
This costrel was based on a one quart, inside, fluid measurment and my trusty old Folgers can was what was used to determin that. As that was the case I used the ends of the can to make the mold to press the wet leather circles in and form the end insert.
The earthenware bottle, when filled with water, became the perfect pestle to shape the leather against the plastic can bottom.
This is the insert after it has dried out, but before it has been punched
In this project my holes are already punched in the costrel body, so I need to just make sure that the flange of the cup-like insert covers both rows of holes. When I am sure of that I use some leather "hyde glue" and adhere it right in place. I then use a star wheel punch to punch through the existing two rows of holes from the body into the flange and then stitch it in place.
This method made it so much easier to make the insert and keep it from getting all crinckly. it compressed and expanded to make a nice even cup.
I know most of you will be saying to yourselves, "Well Duh! Yeah Scott what was the big problem?" Well folks, I am afraid that is just the way I problem solve. Lots of hours staring at it, rolling it around in my mind, trying different ideas in my head and then getting up the nerve to try it!
Sometime it's quick, and sometimes I feel like Gandalf at the West Gate of Moria.
Eventually though, I get my Frodo!
I am Ringulf the Dwarven Woodsman, I craft leather, wood, metal, and clay,
I throw axes, seaxes, and pointy sticks, And I fire my bow through the day.
Come be my ally, lift up your mead! We'll search out our foes and the Eagles we'll feed!
I throw axes, seaxes, and pointy sticks, And I fire my bow through the day.
Come be my ally, lift up your mead! We'll search out our foes and the Eagles we'll feed!
Re: Ceadmon/Ringulf Costrel project
Quite nice!
“Courage is found in unlikely places.†-J.R.R. Tolkien
Re: Ceadmon/Ringulf Costrel project
Very nice work. I completely sympathize with you about how you work. My wife - as well as knife customers if I still have any - think I'm not working on a given project, but trust me, just because the hands aren't moving doesn't mean I'm not working on it.
Can't wait to see the finished product!
Can't wait to see the finished product!
Ichthean Forge (pronounced Ick thee an). Maker of knives, and primitive camping gear.
Re: Ceadmon/Ringulf Costrel project
I love the way this is turning out, Ringulf! It looks absolutely beautiful! I would be scared off by a costrel project at this point simply because all of those seams would worry me with regard to leakage, but it sounds like you've got the whole thing pretty well in hand. I'm eager to see how the final product works out for you!
And as for your methods, I completely relate. That's often almost exactly how I do things myself. I'll charge in headlong before realizing that I forgot to work out a vital point, so the project will sit and sit until I have a "eureka!" moment (hopefully), and can finally go back and finish it. Lately I've taken to sort of constructing my projects in my head, step-by-step ahead of time, to try and do all this reasoning beforehand, but often the reality of constructing something turns out to be vastly different than how I think it will work in my head.
At any rate, I think this is a fantastic project! I can't wait to see the final result!
Maerondir Perianseron, also called “Mickel,” Halfling Friend - Ranger of the Misty Mountains
-
wulfgar

- Amrod Rhandir
- Posts: 431
- Joined: Mon Apr 05, 2010 2:53 am
- Location: Dardanelle, Arkansas
- Contact:
Re: Ceadmon/Ringulf Costrel project
Excellent work sir! I have always wanted a costrel.
You can't take the sky from me.