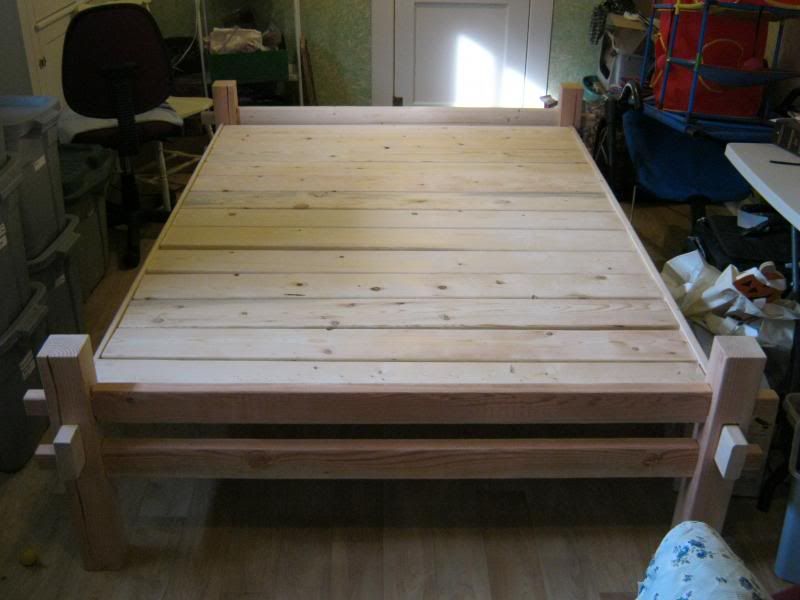
This is the first thing I made to order. It's a full size bed based slightly on the Gokstad bed. It was the first time I built anything big so it's somewhat rough and overbuilt. Rather than doing the endboards out of a single piece, I used two 2x4s each. The slats are not held in place with mortise and tenon joints like the original, but simply sit on a trough in the sides. I probably won't do that for the main support anymore as the sides could warp rather easily and the slats fall out. But so far I'm told it hasn't been a problem.
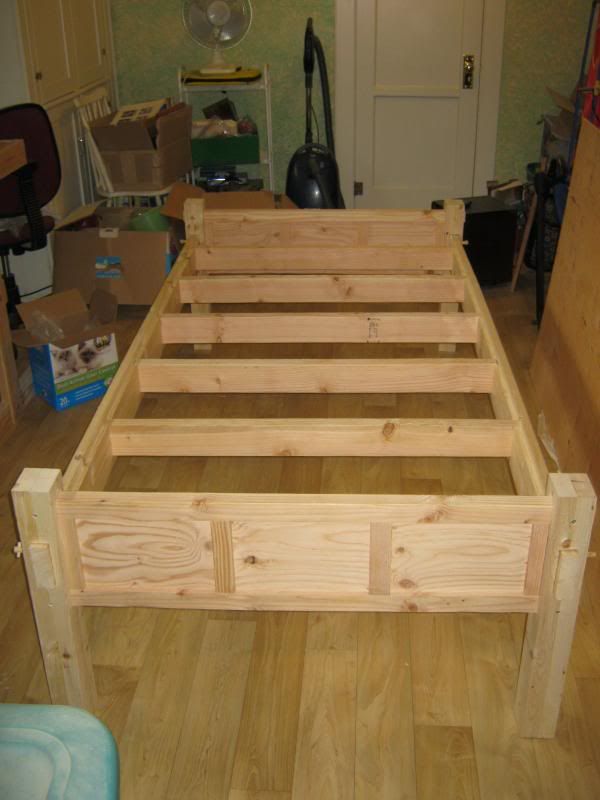
Mostly complete in this picture, only had the holes for the pegs left to drill.
There was a second as well, same design, but as a queen size.
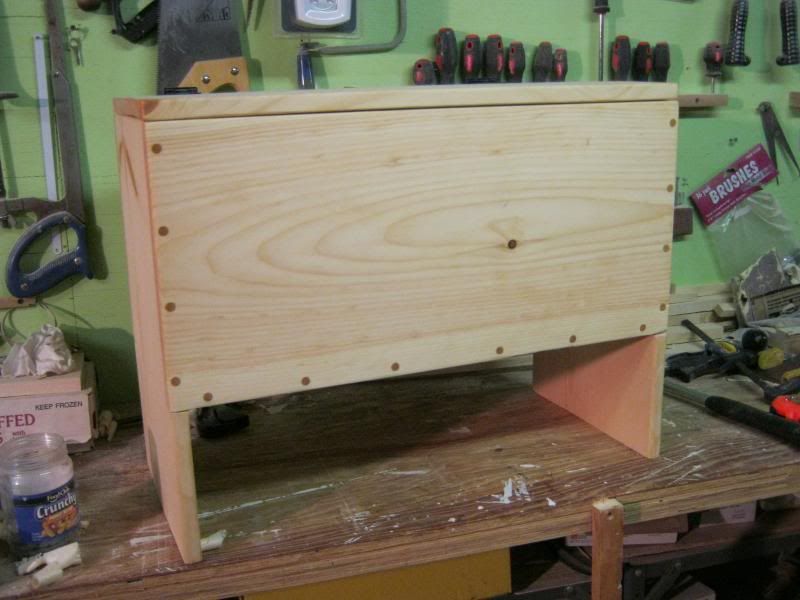
This is a twin size bed also built to order. Same basic design as the last, but paneled the endboards as the family that ordered it are a later period, as well as to drop the price down and do a test. Each endboard is a single 2x4(I think), and plywood panels. Originally I had it held together by friction, but I glued it later on.
Each leg is made from 2x4s planed down and glued together. The endboards are fixed to the legs using screws due to an oversight, leaving the ends together makes it much easier to assemble. Each slat uses a mortise and tenon to keep in place, and two are through tenons. A piece of plywood goes on top of the slats when necessary, though I don't believe it would be needed if used with a normal mattress. It could probably be replaced by rope strung across the slats as well. The whole thing is held together by the four pegs inserted into the legs.
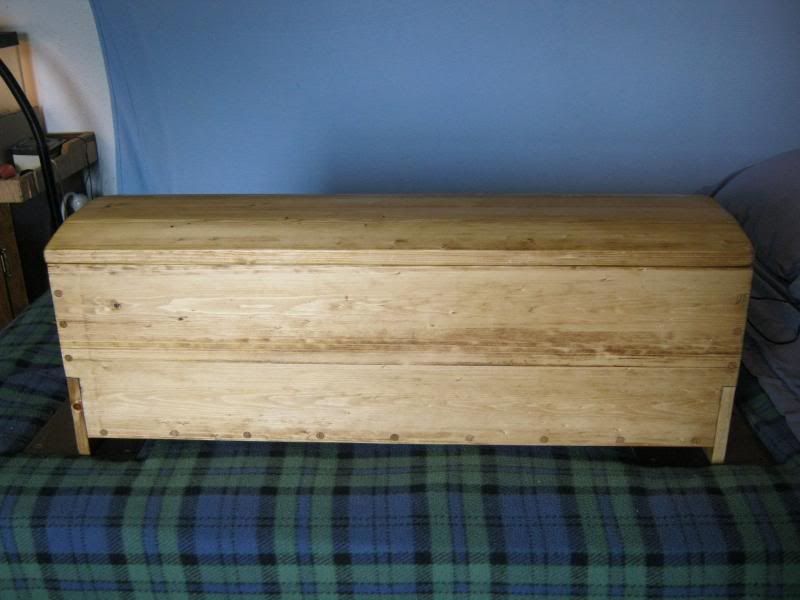
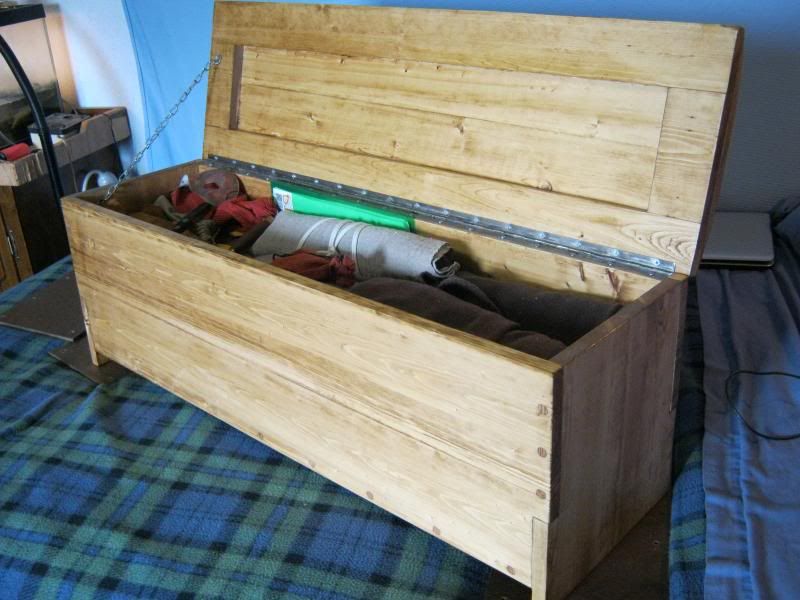
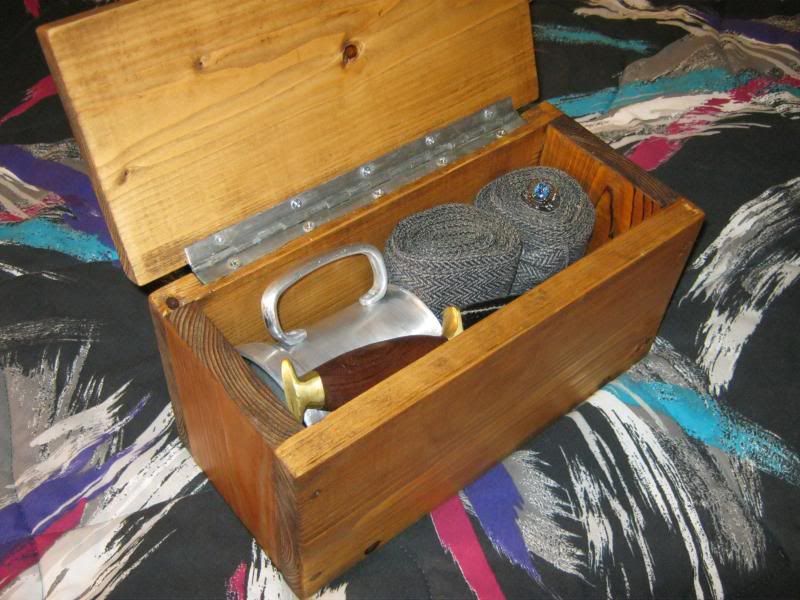
This is the first chest I made and I still use it. Based upon the Mastermyr chest originally, but after seeing how much wood would be wasted with the plans I had I decided I would come up with some plans myself. More or less a standard six board chest, but with a special top that was rounded over. It was stained with a mix of clear and dark dane oil and sealed using tung oil. The chain is on there to stop the top from opening too far and pulling the hinge off. I've stopped using piano hinges since, though may use them on smaller chests.
Made a couple more basic six boards, finished with raw linseed oil. These use black decorative hinges rather than piano hinges. However these ones don't have shoulders for the front and back to rest on. Still plenty strong though. These were made to sell, but didn't go. I've still got both and use one, which has turned a really nice gold color. The other is still pale yellow for some reason.

Like the last chest, but longer legs and with shoulders for a little more support as it would probably be used as a bench more often than not. Also stained with raw linseed. Traded it for some hand etched glasses.
http://i98.photobucket.com/albums/l273/ ... 041001.jpg
I wish I still had this one. Like the last but I angled the legs and rounded the corners on the top. It's a little tall and had I kept it I would have knocked an inch or two off. It is stained with a similar mix of dane oils to my first chest, and sealed with raw linseed. This one got a little dinged up while I was working on it so it does have some distress.
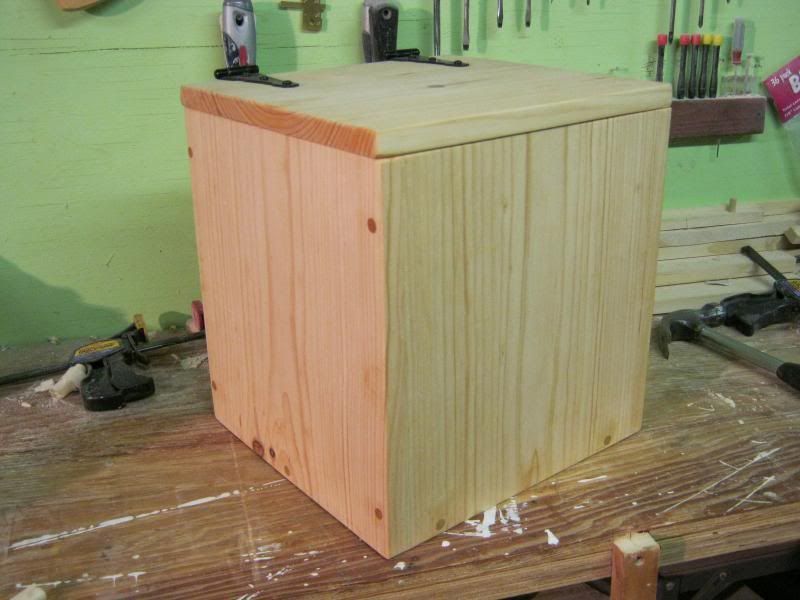
Had just enough wood left to make a smaller box, more suitable for trinkets and little bits and bobs than actual storage. Decided to make all the grain on the sides run vertical and ended up with near perfect joints, it's very hard to see them. I would have missed them myself a few times if it wasn't for the pegs.
Another little trinket box, threw it together with some leftovers for a friend. Stained using dark dane oil.
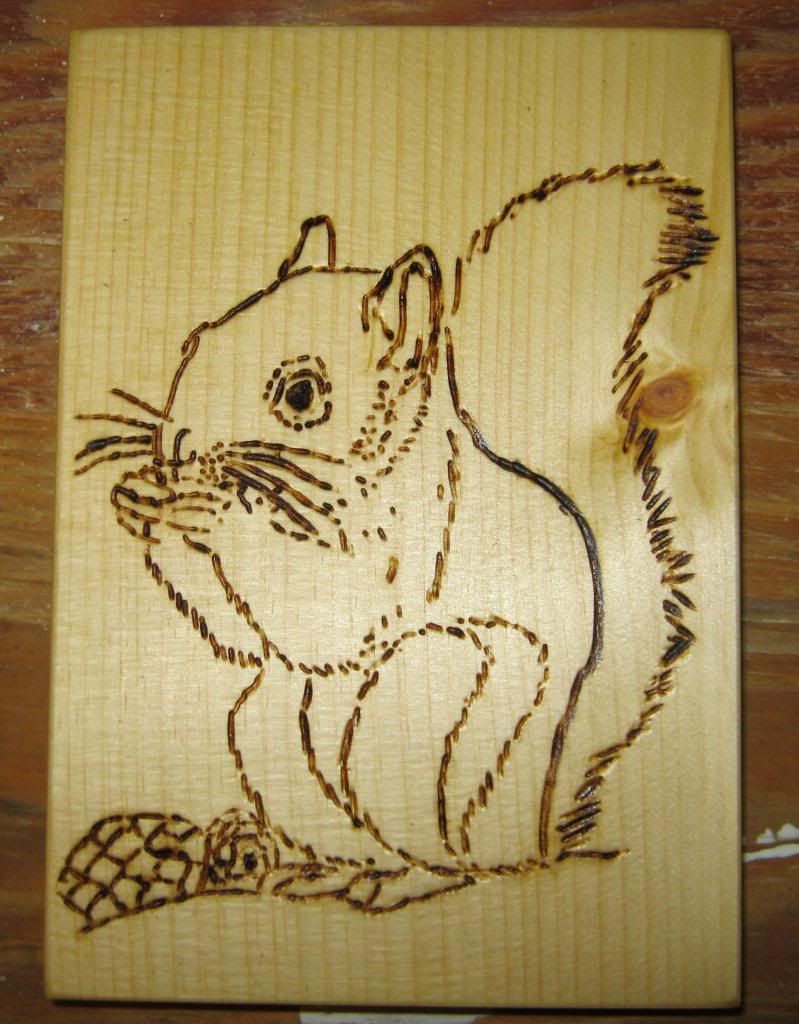
Figured I'd try my hand with a bit of woodburning, so I printed out a picture and went off that. Unfortunately I didn't have any carbon paper so I didn't get it quite right, but I was still able to use the normal paper as a template by keeping it damp. I have since been told about using an overhead projector for burning patterns...
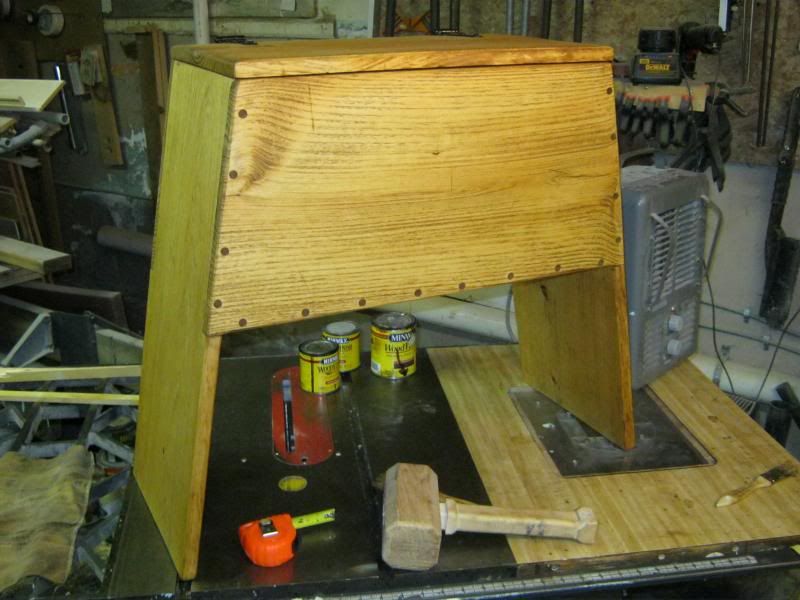
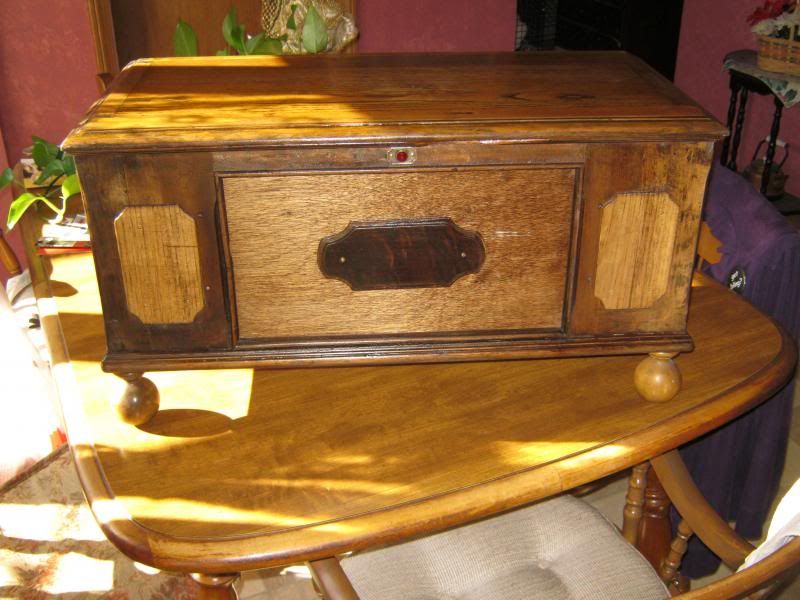
I was with my parents on Father's day and my mother saw this on the side of the road. It was in rough shape, looked like it sat in a basement for years and was left out in the rain that week. The laminant was peeling off, had a dank dirty smell to it and had water stains. Got it home, stripped the laminant off and let the wood itself dry. I'm not sure what the front is made of, but the sides, back and top are oak. I replaced the panel in the front with plywood and took the intact emboss(?) and put it in the center. Later went and put more stain on the plywood and pine to make it match more. I have to wonder how old this is and what it used to be. It has a bunch of oddly placed holes on the bottom, and looks like there used to be some sort of plates on one side and the back. I'm assuming it might have been a radio at some point. And for oak to be laminated..you don't see that happen anymore, oak is one of the woods everyone wishes they could use.


