Hobbit's Water Bottle
Posted: Tue May 13, 2008 9:46 pm
A quick leather project for those of you with some small craft size pieces of 2-3 oz leather laying around.
As Andy pointed out when the first discussion of water carrying devices occured on the Meranger site. The hobbits carried their water in bottles, one would assume they were leather covered to reduce the likelyhood of damage so here goes.
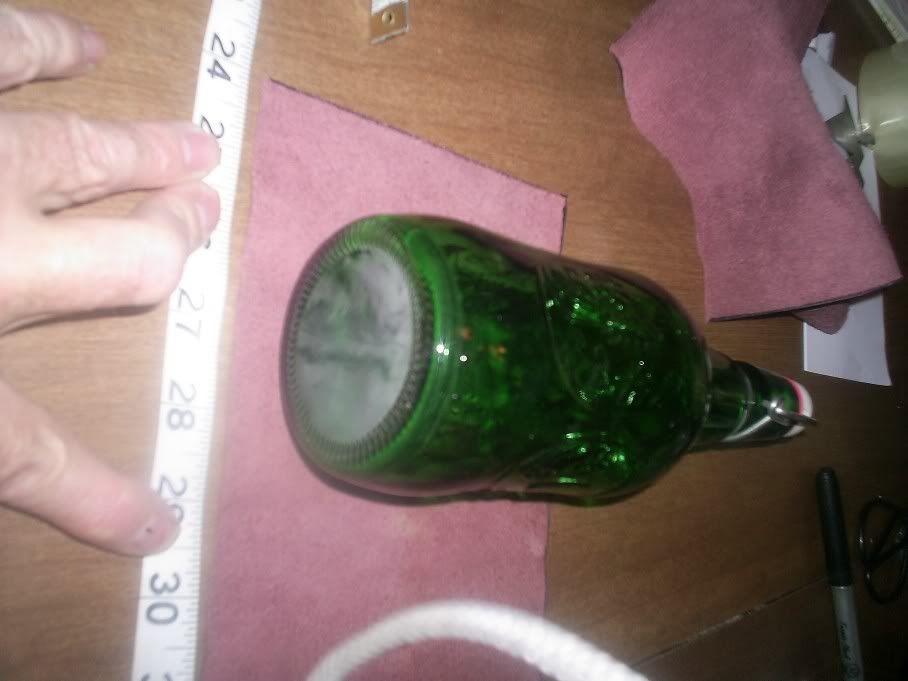
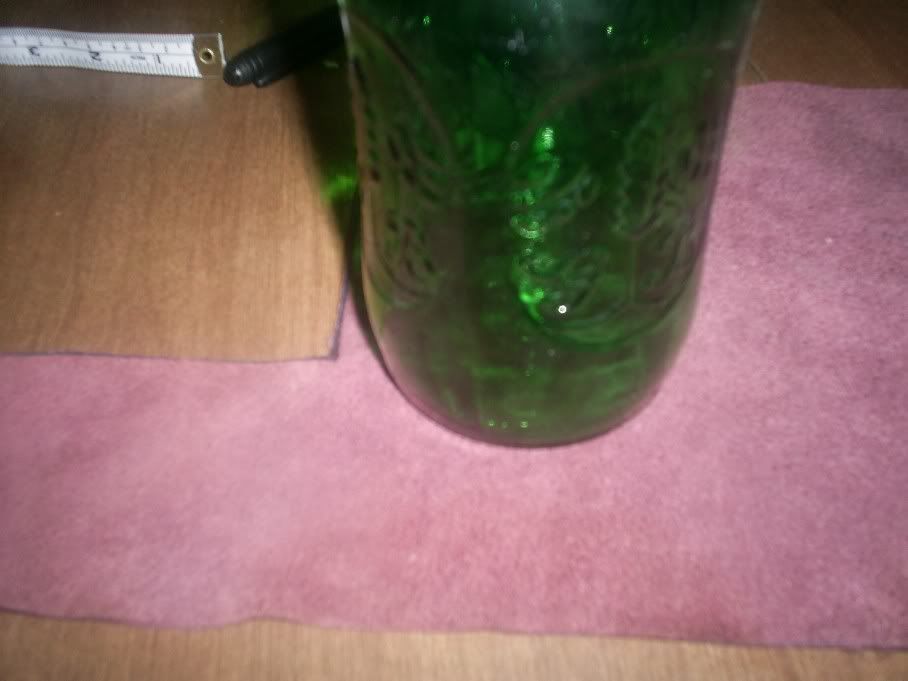
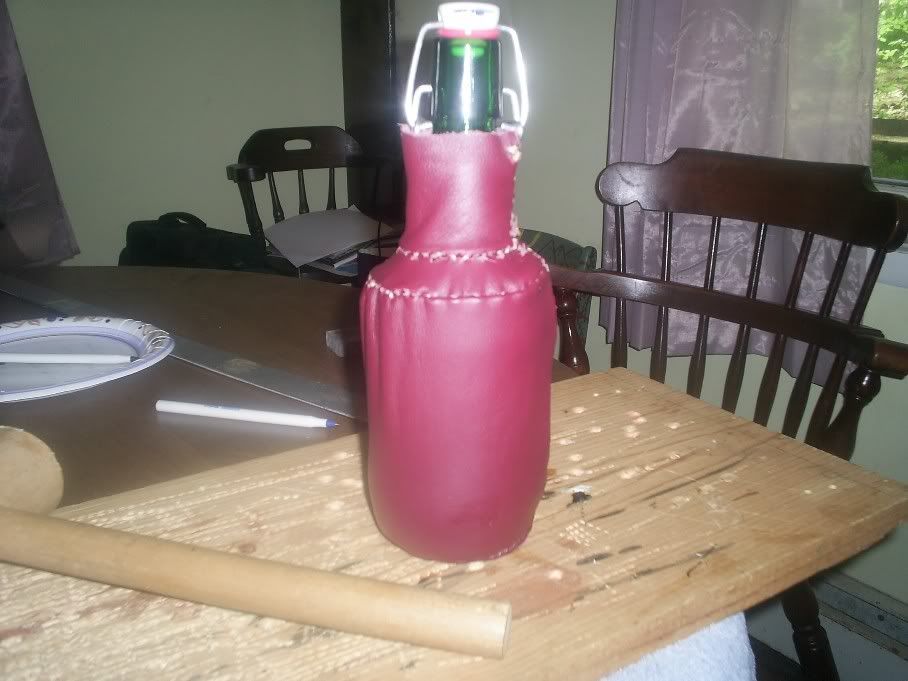
The bottle pictured is an old Grolsch beer bottle but the same procedure will work with just about any glass or clay bottle.
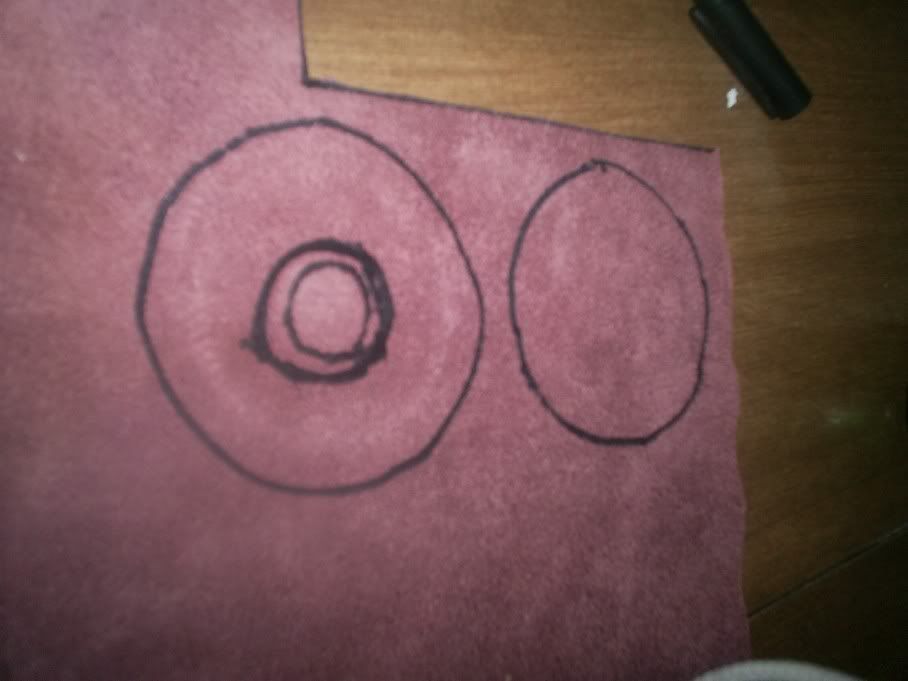
Take your bottle and stand it up on your leather, make two tracings of the bottom of the bottle. Allow about a 1/4" between the line and the actual bottle. This can be done very easily by putting your pen or marker vertically flush with the side of the bottle and just run it around the bottle.
Take a measurement of the straight part of the bottle (before it begins to taper)and add 1/2". That will leave you a 1/4" on both top and bottom extra for the stitching. Measure the rest of the top of the bottle and add 1/4".
The next measurements are the circumference of the bottle at it's widest and at the top and add a 1/2" (1/4 for each of the overlapping edges). If your bottle has a slow taper you should measure this at the bottom of the taper.
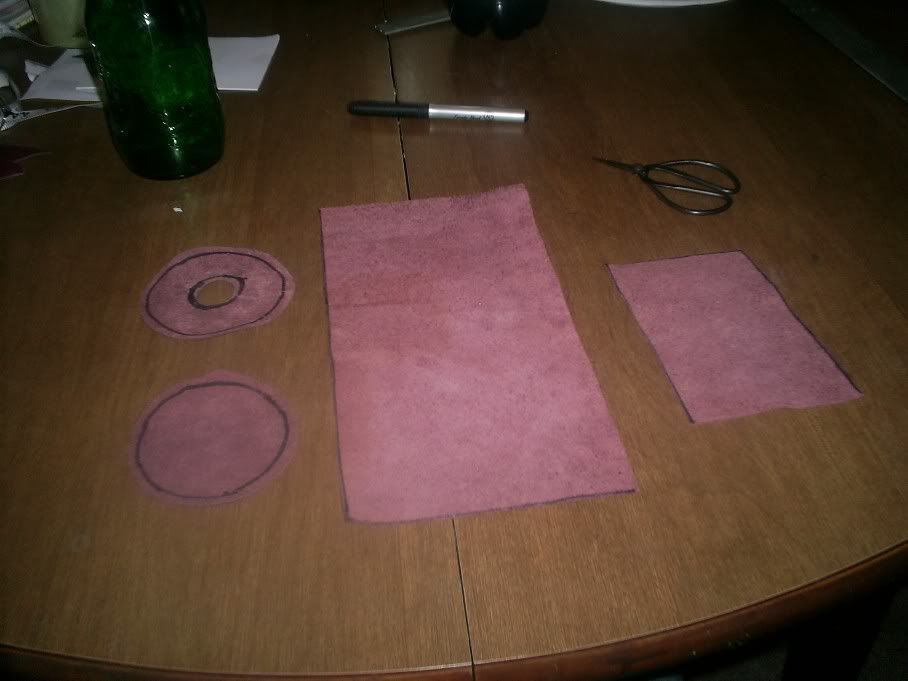
Transpose the measurements to your leather and cut out all four pieces. You will now have the two round pieces and 2 rectangular pieces. Cut out the center of one of the cirular pieces to approximately match the stem of your bottle at it's base.
Punch out your stitching hole and sew all four pieces together. Stitching them inside out is easier then rightside out. You may have to double up on some of the stitches as the pieces will not line up exactly. Leave the top to bottom vertical stitch till last.
Turn your covering rightside out and place on the bottle. Stitch up the vertical holes and your done.
You can add a leather handle or strap to yours or to make it more shock resistant add a layer of synthetic or actual sheepskin underneather the covering. Make sure you take any under layer into account on your measurements before cutting your leather pieces.
This project will take about an hour to measure, cut and punch out the stitching holes and figure another hour to hand stitch, making it a perfect task while watching TV.
I'll have to add pics later
As Andy pointed out when the first discussion of water carrying devices occured on the Meranger site. The hobbits carried their water in bottles, one would assume they were leather covered to reduce the likelyhood of damage so here goes.
The bottle pictured is an old Grolsch beer bottle but the same procedure will work with just about any glass or clay bottle.
Take your bottle and stand it up on your leather, make two tracings of the bottom of the bottle. Allow about a 1/4" between the line and the actual bottle. This can be done very easily by putting your pen or marker vertically flush with the side of the bottle and just run it around the bottle.
Take a measurement of the straight part of the bottle (before it begins to taper)and add 1/2". That will leave you a 1/4" on both top and bottom extra for the stitching. Measure the rest of the top of the bottle and add 1/4".
The next measurements are the circumference of the bottle at it's widest and at the top and add a 1/2" (1/4 for each of the overlapping edges). If your bottle has a slow taper you should measure this at the bottom of the taper.
Transpose the measurements to your leather and cut out all four pieces. You will now have the two round pieces and 2 rectangular pieces. Cut out the center of one of the cirular pieces to approximately match the stem of your bottle at it's base.
Punch out your stitching hole and sew all four pieces together. Stitching them inside out is easier then rightside out. You may have to double up on some of the stitches as the pieces will not line up exactly. Leave the top to bottom vertical stitch till last.
Turn your covering rightside out and place on the bottle. Stitch up the vertical holes and your done.
You can add a leather handle or strap to yours or to make it more shock resistant add a layer of synthetic or actual sheepskin underneather the covering. Make sure you take any under layer into account on your measurements before cutting your leather pieces.
This project will take about an hour to measure, cut and punch out the stitching holes and figure another hour to hand stitch, making it a perfect task while watching TV.
I'll have to add pics later


 I think this is a Czech or Eastern bloc water bottle.
 Thought this was a neat design too.